Gravity Press 3.x now offers the ability for your customer to dynamically choose the number of sub-accounts they want to purchase in Gravity Forms, which will create that same number of available sub-accounts for that customer.
This can be done by adding a quantity field to your Gravity Form.
Requirements
To properly set this up, make sure that you have installed the following:
- Gravity Forms
- Gravity Press 3.0
- MemberPress 1.3+ (Developer, Plus or Pro editions)
- MemberPress Corporate Accounts Add-on
For MemberPress Corporate Accounts Add-on installation instructions, please check this link.
After you have successfully installed the add-on, you’re ready to create your corporate membership in MemberPress.
IMPORTANT : Before creating your form and setting up your feeds; to properly set up Gravity Press 3.0 , please configure your payment settings in MemberPress as well. Whether you are using Stripe or PayPal, make sure that the MemberPress Stripe webhooks and PayPal IPN URL are integrated correctly. You can do this by going to MemberPress -> Settings -> Payment.

Creating a Corporate Membership
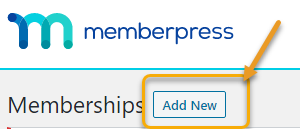
You can create or edit a membership for your corporate members to sign up for. All you have to do is go to MemberPress on your WordPress admin area. Click on Memberships → Add New (you may also edit an existing membership).
The price you should be setting up for this corporate membership should be the price you have decided for one sub-account.
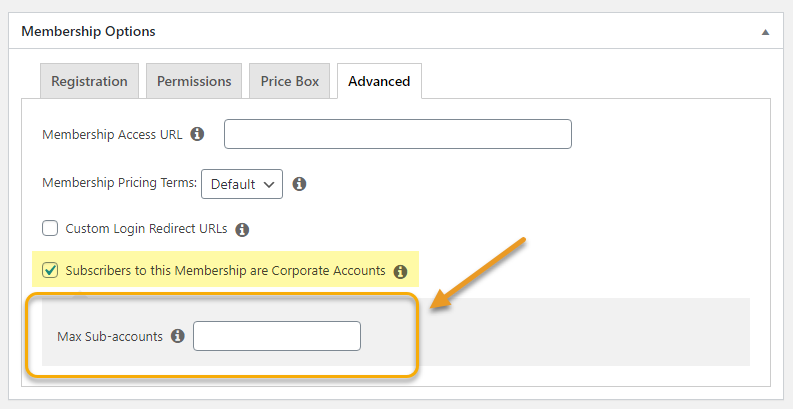
After you have created your membership, click on the Advanced Tab under Membership Options to set subscribers to this specific membership as corporate accounts. Please also leave the max sub-accounts field empty since your customers will be dynamically choosing how many they would purchase later in Gravity Forms.
Using Gravity Forms for your Corporate Membership
In this example, we will be setting up a simple form. We’ll add the following fields to our form:
- Name
- Username
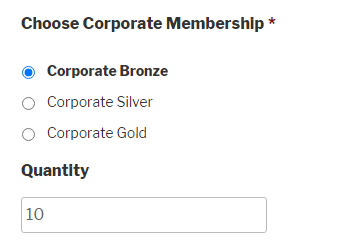
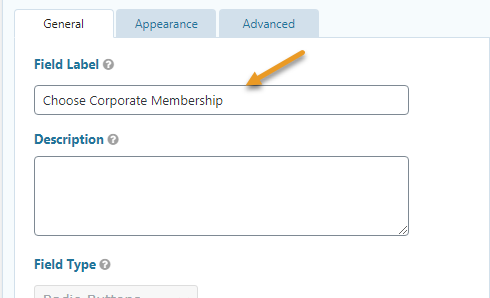
- Product – (This should be changed from Single Product to Drop Down or Radio Button) Below are instructions on how to properly set your Product label
- Rename the Product field label.
- Check the box for show values so that it would show both the value and the price of the choices.
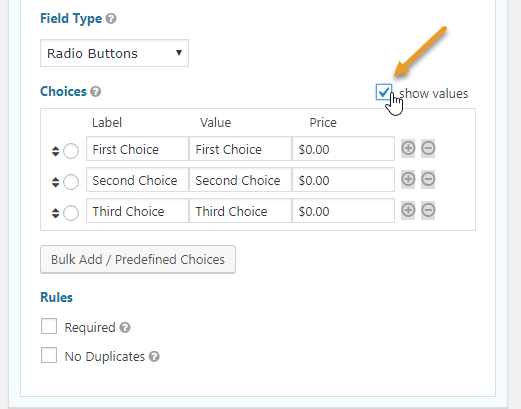
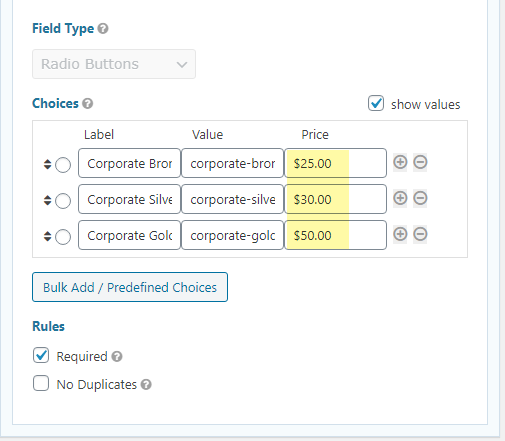
- Then, proceed with clicking on the Bulk Add/Predefined Choices – this would allow you to have access to the MemberPress corporate level/s you have already set up as well as their specific ID.
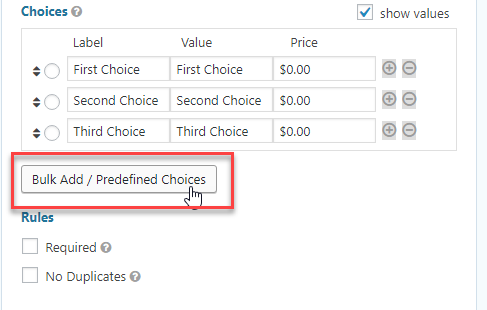
- After clicking on the Bulk Add button, a new box will pop up, scroll down to MemberPress and select the corporate membership/s you’d want to add to your form. Drag your cursor all over those MemberPress corporate level/s and click on Insert Choices.

- Lastly, set up the prices.
- Quantity field*
- Total Field
- Credit Card – (optional depending on your payment collection method)
- Rename the Product field label.
Setting Up Gravity Press Feed
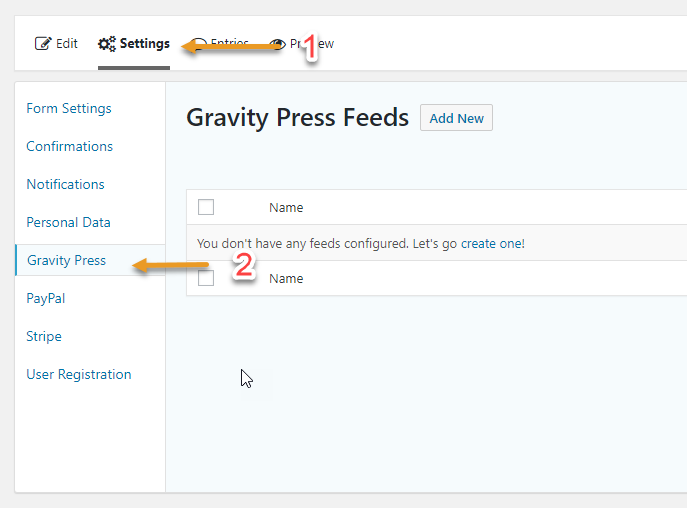
- Add a new feed. You do not have to add separate MemberPress Field for each MemberPress level you have since it’s already taken care of in the Product field you have previously created. In this example, I choose the field “Choose Corporate Membership” because this was the field label of the Product field I have created. Hit on Update Settings to save the feed.
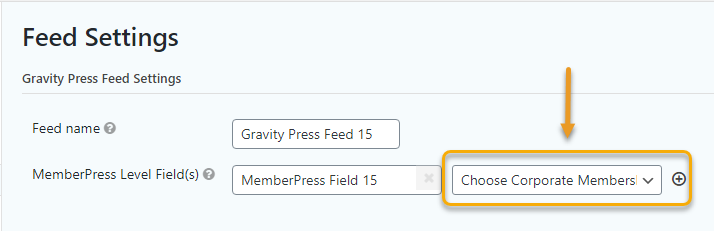
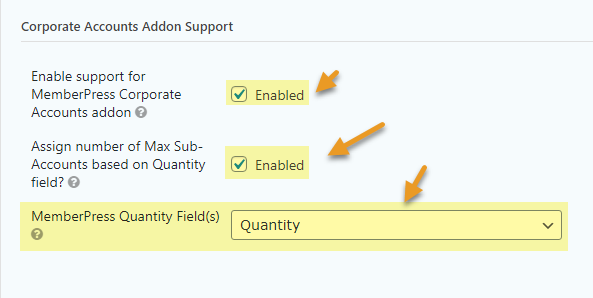
- IMPORTANT: Under Corporate Accounts Addon Support, make sure that you check the box for : “Enable support for MemberPress Corporate Accounts addon” as well as the box for “Assign number of Max Sub-Accounts based on Quantity field.” After, make sure that you also select the correct quantity field.
- Save the feed and make sure that it is activated.
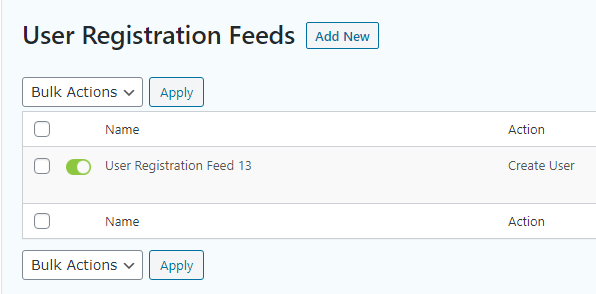
Setting Up User Registration Feed
After setting your Gravity Press feed, you can now create a new “User Registration” feed to register your new users. For more information on how to set up this add-on, please refer to this page or contact Gravity Forms tech support team as this is their support.
- Choose Create User if you want to register the form submitter to your site.
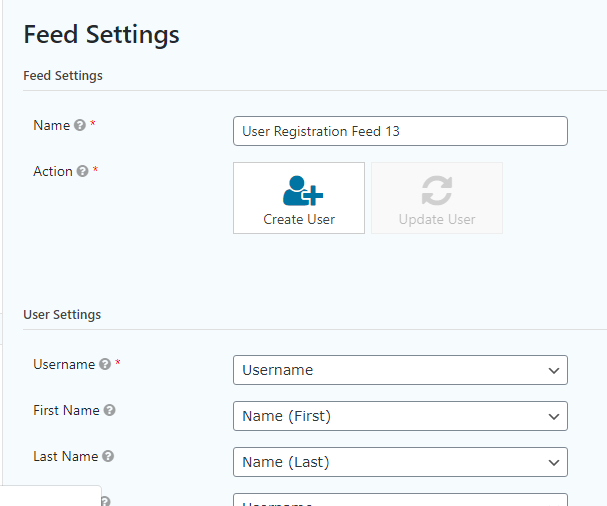
- Choose the role you would want to add your customers to.
- Save the feed and activate it.
Setup Payment Feed (Stripe or Paypal)
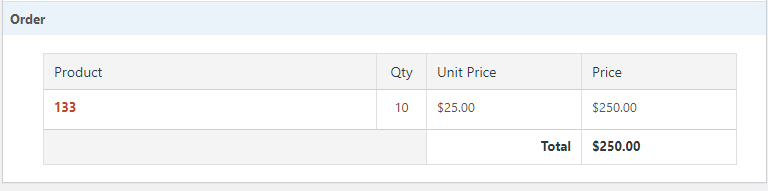
- Under PayPal/Stripe Feed settings, make sure that you set the transaction type to Product and Services for one-time payments and Subscription if it’s for recurring payments. The payment amount should also be the amount on your Form Total.
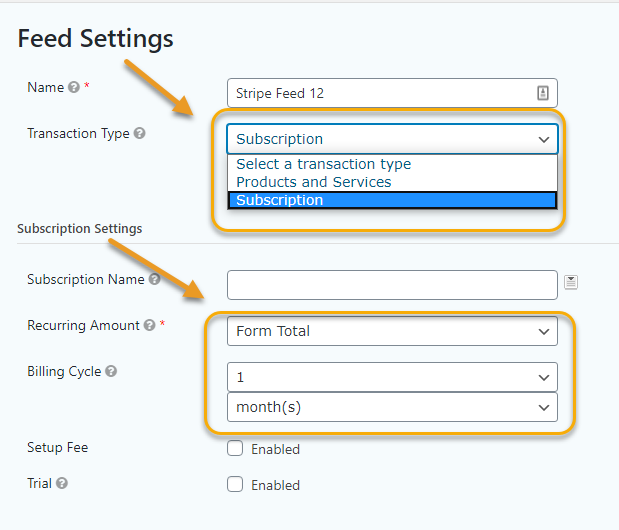
- Save your payment feed and activate it!
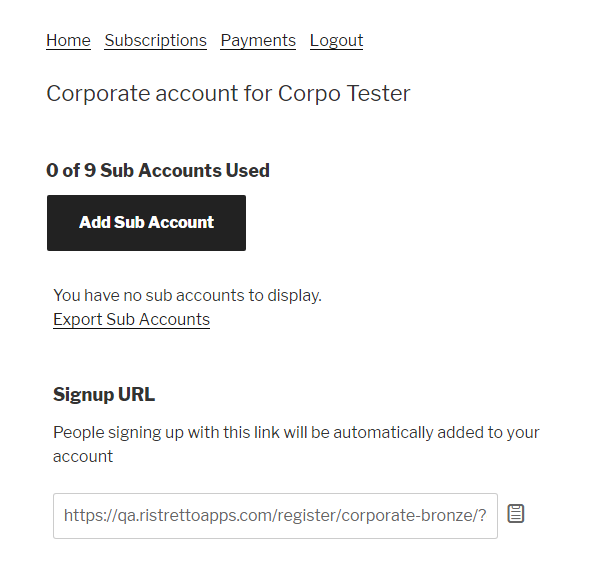
After setting these necessary feeds in your Gravity Forms, your customers can now choose the number of sub-accounts they want from your corporate membership.