Make sure that both Gravity Forms and MemberPress are properly installed. You can only use our plugin, Gravity Press, to integrate these two once they are successfully installed.
Here’s a step-by-step tutorial on how to successfully set up Gravity Press 3 for free memberships.
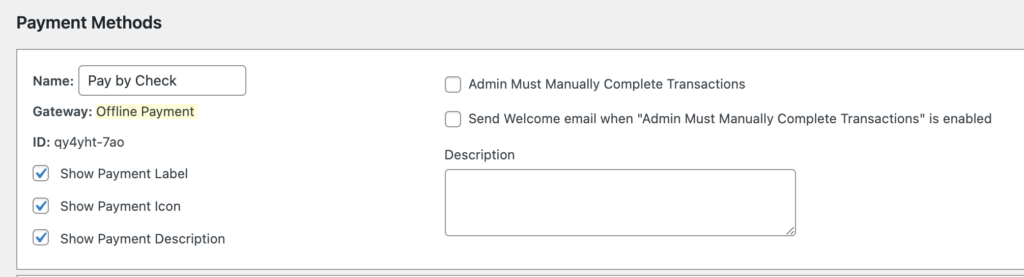
IMPORTANT: For free memberships, you need to add an offline payment method under your MemberPress Payment settings.
This can be done simply by going to MemberPress > Settings > Payments tab.
- Create your registration/signup form.

The important fields that need to be added in a simple registration Gravity form are the ff:
- Name
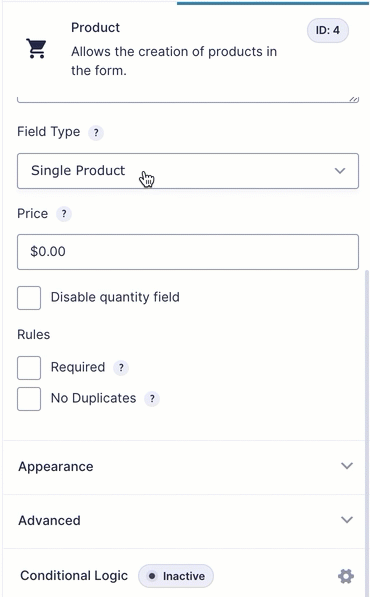
- Product – Below are instructions on how to properly set your Product label.
- Add the Product field and then change it from Single Product to Radio Button or Drop Down.
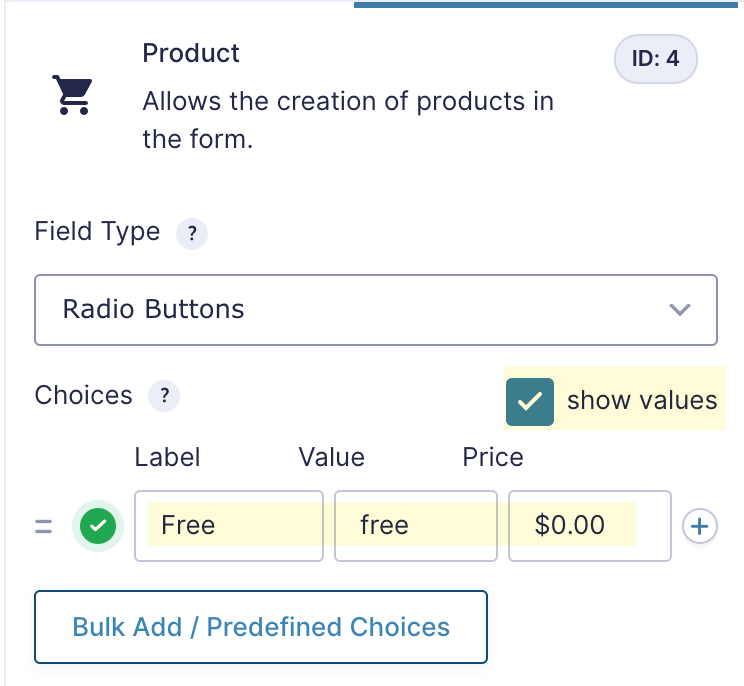
- Rename the Product field label if you want to.
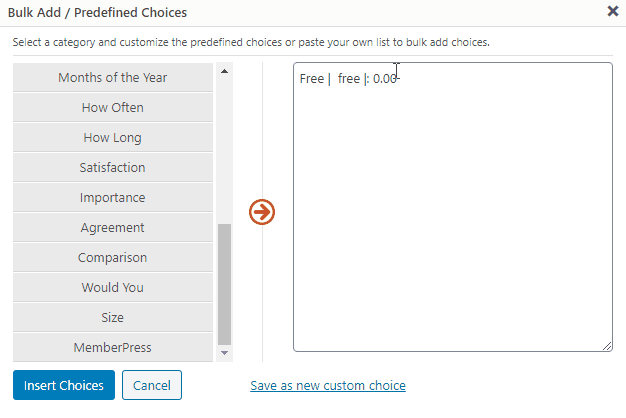
- Then, proceed with clicking on the Bulk Add/Predefined Choices – this would allow you to have access to the MemberPress levels you have already set up as well as their specific ID.
- After clicking on the Bulk Add button, a new box will pop up, scroll down to MemberPress and select the memberships you’d want to add to your form. Drag your cursor all over those MemberPress levels and click on Insert Choices.
- Add the Product field and then change it from Single Product to Radio Button or Drop Down.
- Lastly, make sure that the price for your FREE membership is set to 0. Please also make sure that the value is the slug of the membership level
If you only want to add your customer to only one free membership, you may want to consider hiding the product field. That way, your client do not have to select anything from your product field. Before hiding it, make sure that the free membership is selected by default.
Setting Up Your Feeds
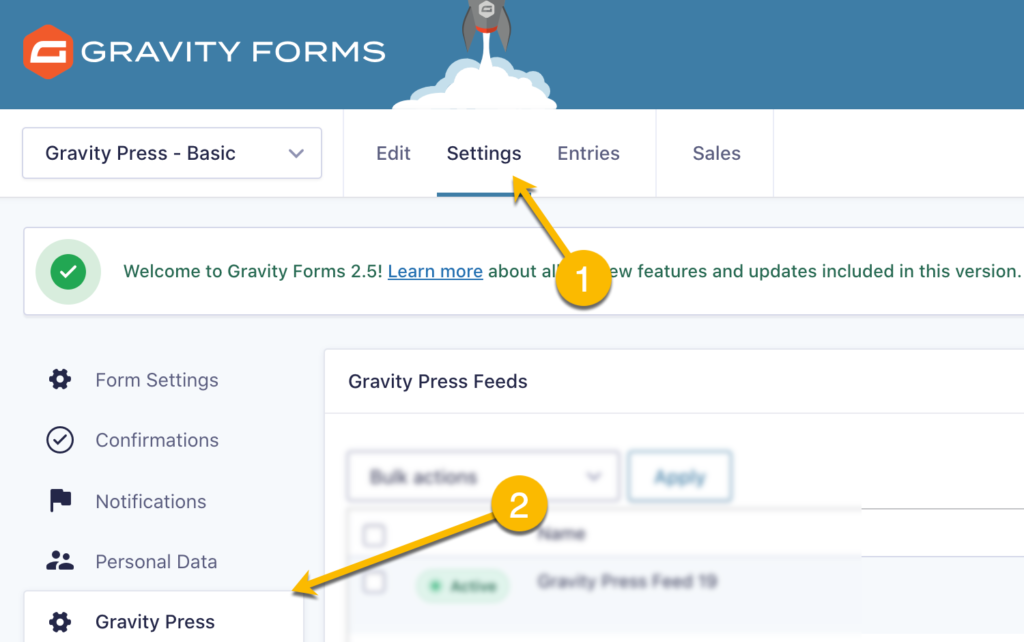
- Set up your Gravity Press feed. To do this, go to your Form Settings and select Gravity Press.
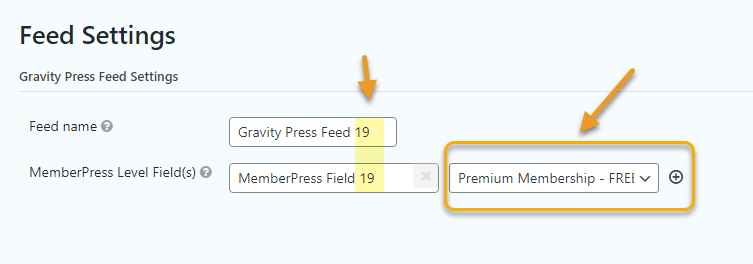
- Add a new feed. Make sure to select the label of the product field you have set up earlier.

For those who are using Gravity Press 2.4x and previous versions: To avoid user registration errors, please also make sure the no. in Feed name matches the no. in MemberPress Level Field.
IMPORTANT: If you set the membership status to Pending in your Gravity Press feed, you will have to manually approve/complete the transaction. However if you set it as Complete/Active, your user will be registered to your free membership level right away.

- Save your feed.
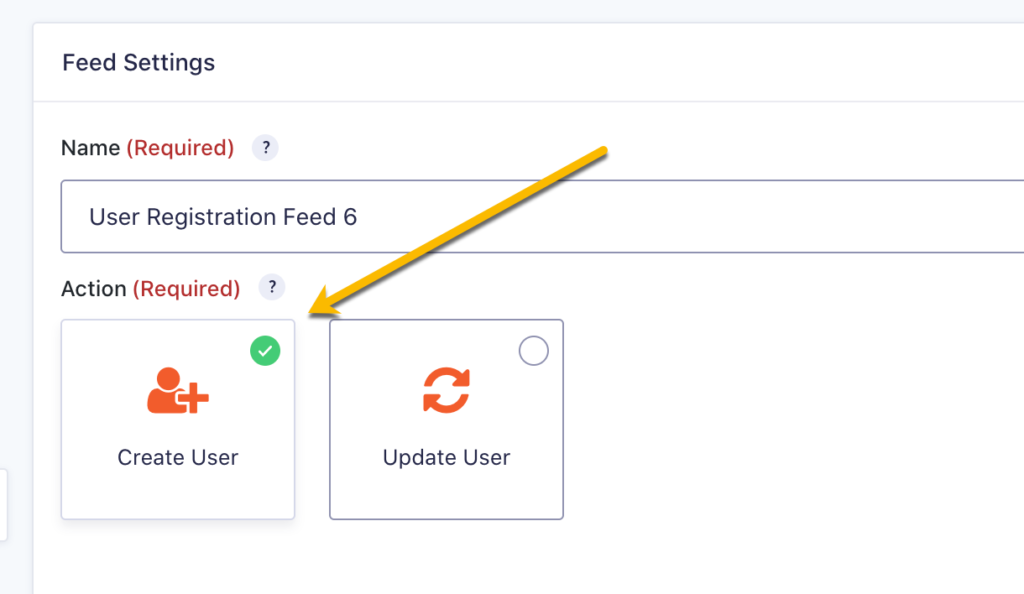
- Proceed with creating a new “User Registration” feed to register your new users. Choose Crete User.
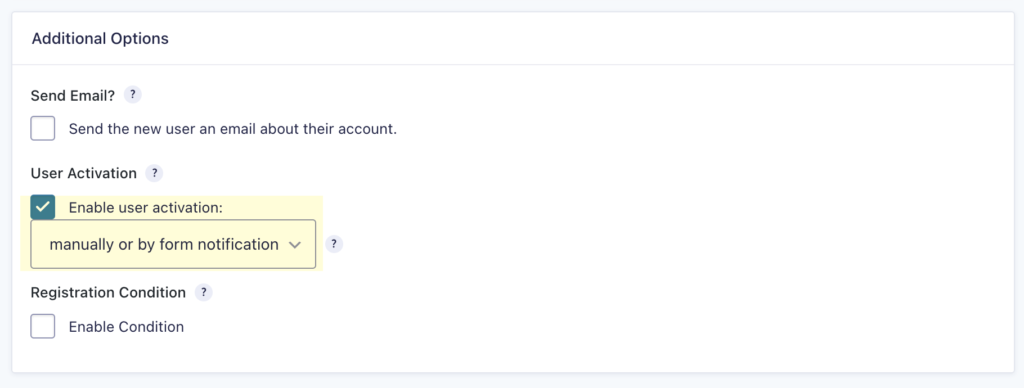
- For automatic registrations, without needing to approve a user registration, do not check the box for enable user activation under User Registration feed’s additional options.
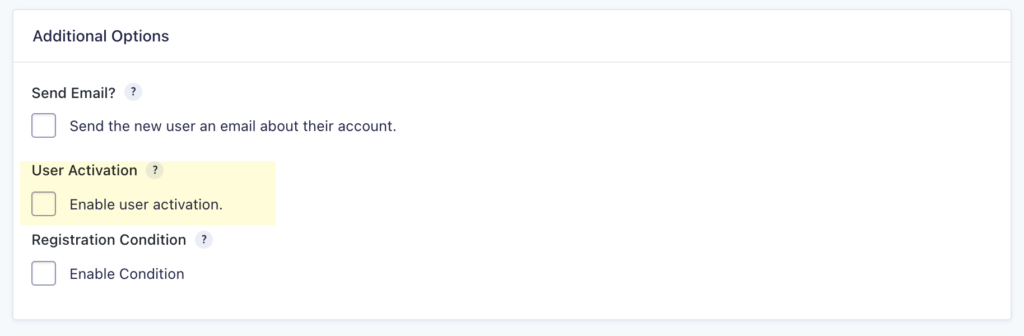
- If you need to manually approve a user’s registration, simply check the box for enable user activation and select manually or by form notification.
- Lastly, DO NOT set up a payment feed. No payment feeds should be set up in your form. (If you currently have an inactive payment feed, make sure to completely delete it.)
So the ONLY way to create a free membership through GF and GP with MemberPress is to have an admin approve it every single time? That seems so exhaustive.
Sorry for the confusion around this Kevin. Users can be registered directly to your free memberships without admin approval as long as you set the membership status to Complete/Active in your Gravity Press feed. We have updated this article to reflect this information.
Thanks much!