Gravity Forms Delayed Notifications
Schedule Sending Gravity Forms Email Notifications by Period-of-Time, Specific-Date, or Form-Field from the Moment of Submission
In order to start using any plugin from Ristretto Apps, you’ll need to first install and activate them on your WordPress site. This can be done through two different ways: one is via the WordPress installer and the other is via FTP.
Via WordPress
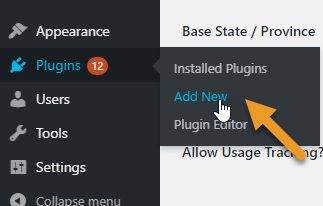
- The process is similar to how you would install a normal plugin. First, you have to go to the WordPress dashboard, go to plugins and click “Add New”
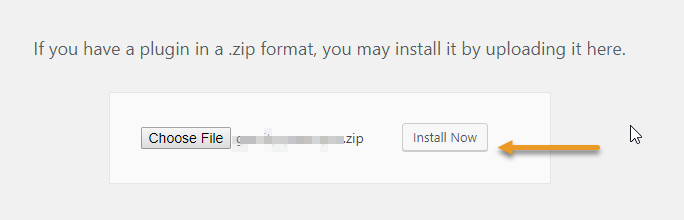
- You will see the option for “Upload plugin”

- Use the file chooser, navigate your computer files and select the downloaded zip file of the plugin you want to install.
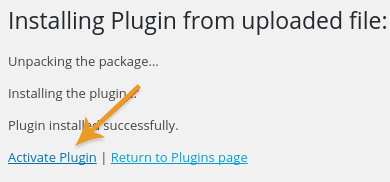
- After it’s fully uploaded, just click the “Activate” link
Via FTP
FTP stands for File Transfer Protocol. In order to use FTP you’ll need a client program for your computer.
Click here to read Lifehacker’s article on the best FTP programs for Mac and Windows.
Unzip the file before you transfer the plugin. With OSX, this can be achieved by simply double clicking the zip file. With Windows, you will have to right click on the zip file and then select the option Extract All. These two instructions will automatically create a new folder named the same as the zip file.
After doing this, you will have to connect to your server using your FTP program. After you have connected, you need to find the Document Root for your site. This is basically the folder where all of your WordPress files are. It is usually called public_html or named the same as your site’s domain name but it could be anything. If you’re not certain, please feel free to ask your host.
After locating your Document Root, you will have to use your FTP program to go into wp-content/plugins/. Proceed with uploading the plugin folder that was created by unzipping the plugin file.
Important Note: Ensure that you upload the plugin folder, not the zip file since the zip file won’t function on your site.
After Installing
Once you’ve installed and activated your extension there are several things you should do.
Activate Your License
Simply go to your WordPress dashboard, click on Forms → Settings → General Settings and enter the key there.
Configure Settings
Generally, our plugin’s settings can be found on the left sidebar of your WordPress Dashboard.