Here’s a guide on how to set up Gravity PMP for recurring subscriptions.
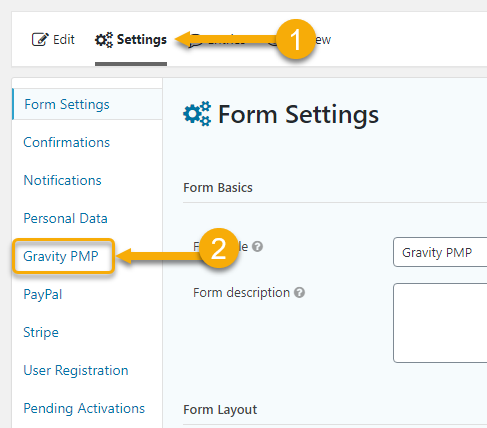
All settings for Gravity PMP are in the WordPress admin. In the left column look for Forms, and under there, Settings → Gravity PMP.

You need to install Gravity Forms and Paid Memberships Pro and activate them first before you can successfully use our plugin, Gravity PMP, in integrating these two.
After activation of the three plugins mentioned, you can now proceed with creating a new integration between your Gravity Forms checkout form and Paid Memberships Pro using the standard Gravity Forms Add-On feed method.
Gravity Forms + Paid Memberships Pro Integration with Gravity PMP
Gravity PMP Pro Setup for Recurring Payments using Gravity Forms 2.5x
Here’s a step-by-step tutorial on how to successfully set up Gravity PMP for recurring payments.
- Create your registration/signup form.
The important fields that need to be added in a simple registration Gravity form are the ff:
- Name
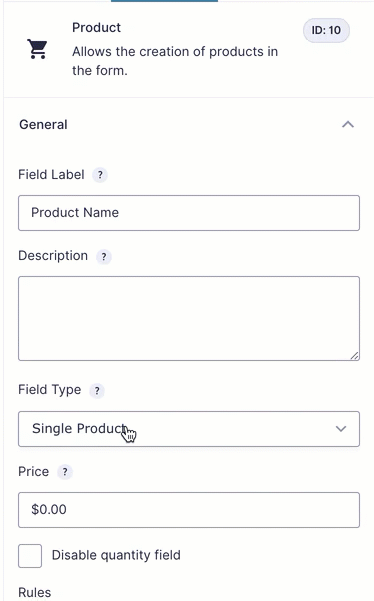
- Product – Below are instructions on how to properly set your Product label.
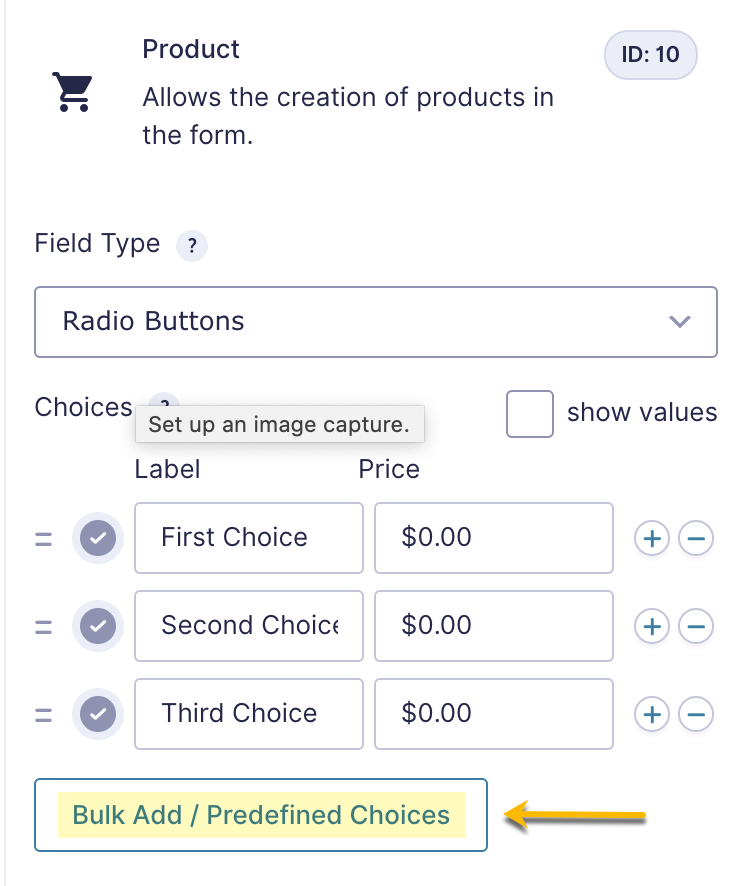
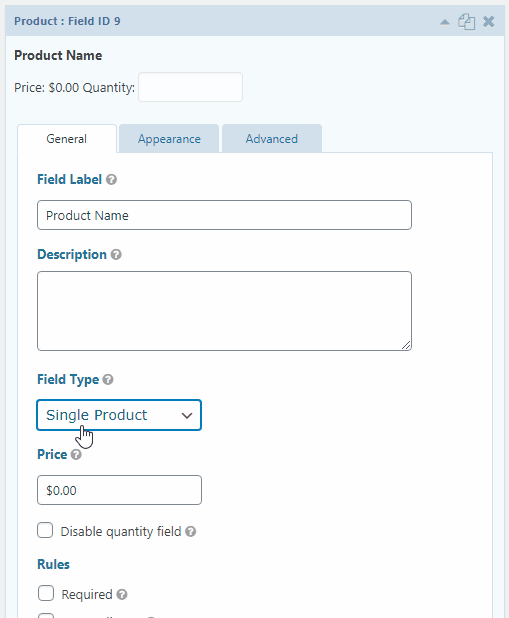
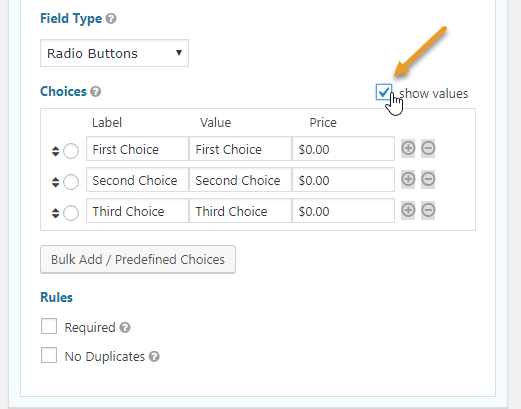
- Add the Product field and then change it from Single Product to Radio Button.
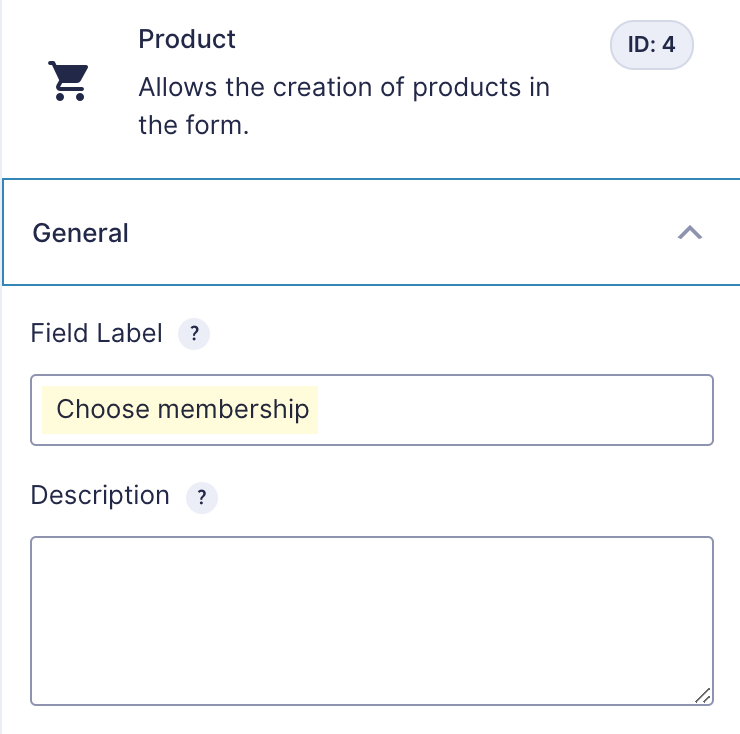
- Rename the Product field label.
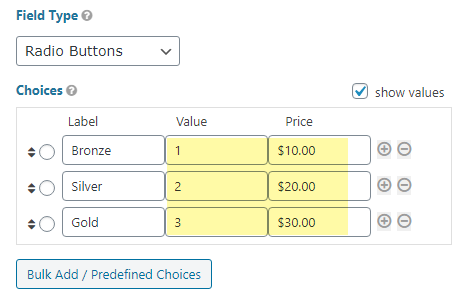
- Check the box for show values so that it would show both the value and the price of the choices.
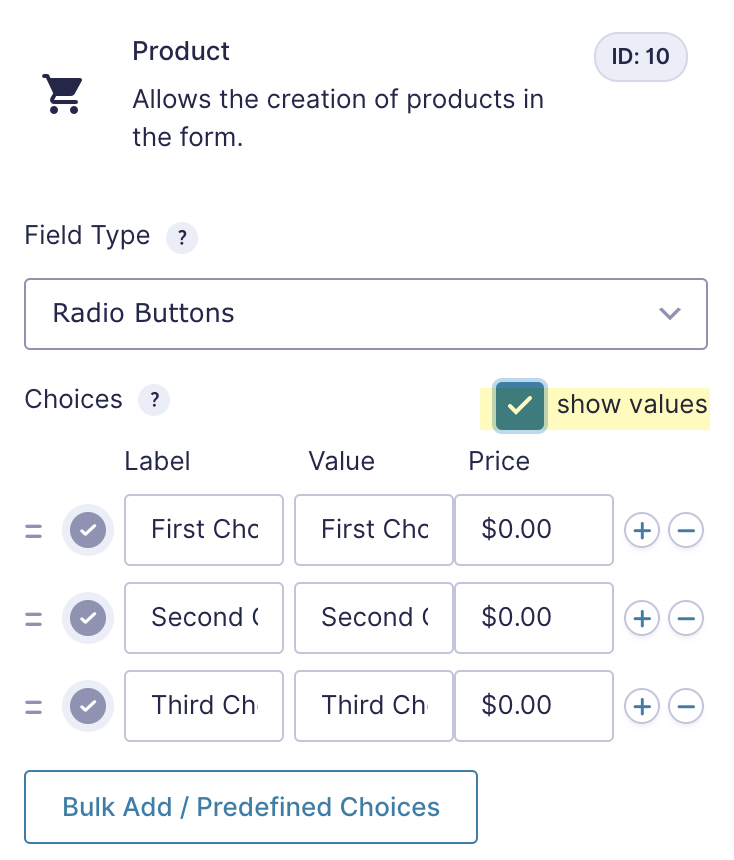
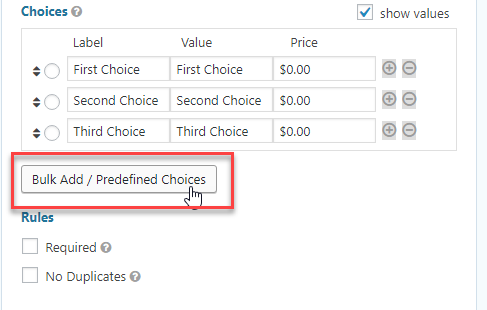
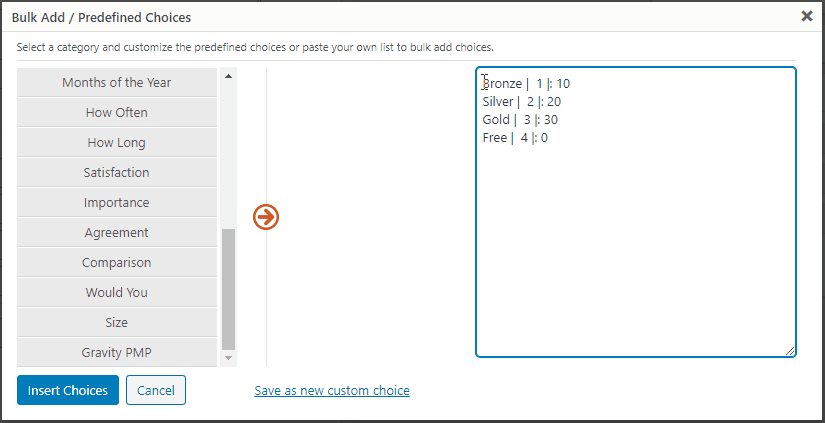
- Then, proceed with clicking on the Bulk Add/Predefined Choices – this would allow you to have access to the PMP levels you have already set up as well as their specific ID.
- After clicking on the Bulk Add button, a new box will pop up, scroll down to Gravity PMP and select the memberships you’d want to add to your form. Drag your cursor all over those PMP levels and click on Insert Choices.
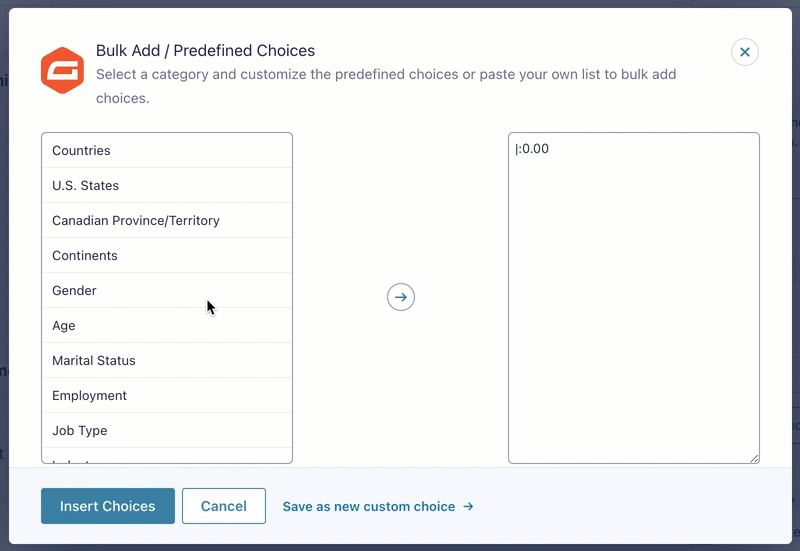
Inserting Predefined Choices to your Product Field with Gravity Forms 2.5
IMPORTANT: Since this is a setup for recurring payments, make sure under your PMP membership’s Billing Details, the box for recurring subscription is checked. Set the cycle of your membership as well.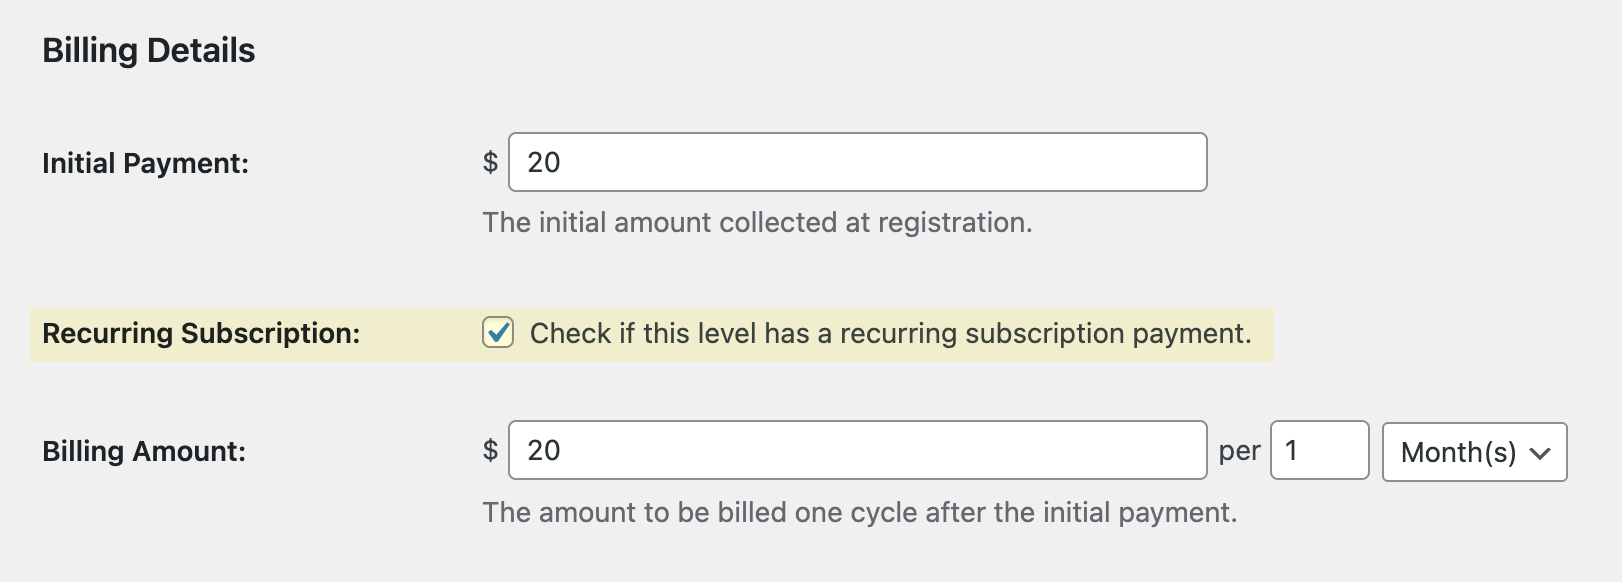
- Lastly, set up the prices. Please also make sure that the value is the slug of the membership level.
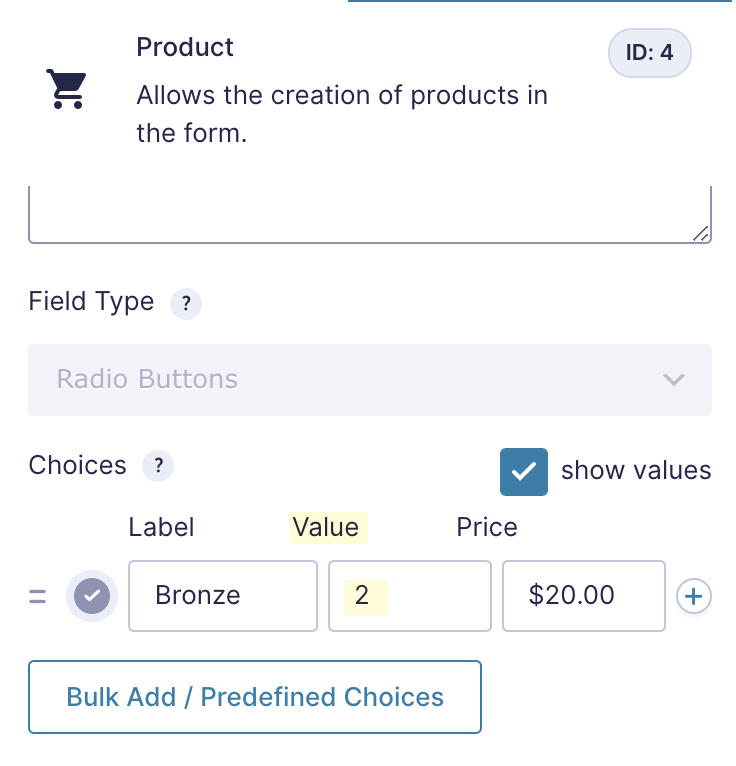
- Lastly, set up the prices. Please also make sure that the value is the slug of the membership level.
- Total
- Credit Card (optional – depending on they type of Payment collection method you’re using. Add this to your Gravity Form, if your Stripe payment settings is set to Gravity Forms Credit Card Field. For PayPal Standard , you do not have to add a credit card field. )
- To set up your Payment Collection Method, please go to Gravity Form -> Settings > Stripe/PayPal
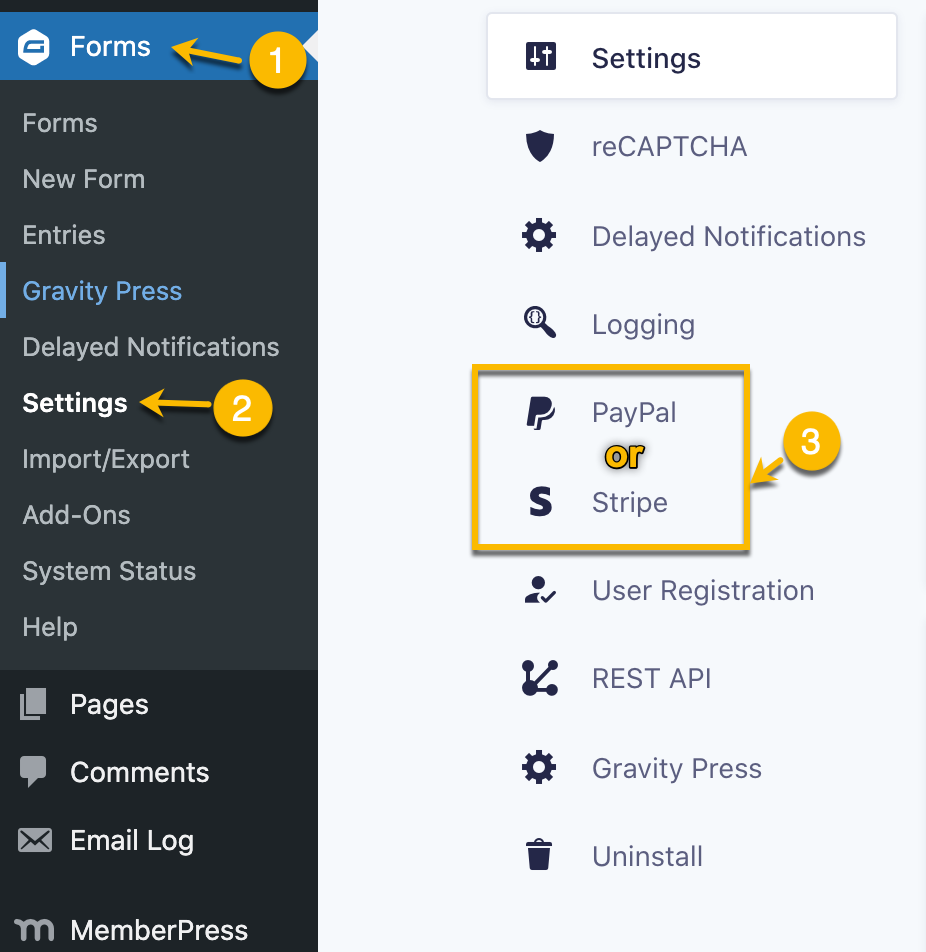
- To set up your Payment Collection Method, please go to Gravity Form -> Settings > Stripe/PayPal
- Add the Product field and then change it from Single Product to Radio Button.
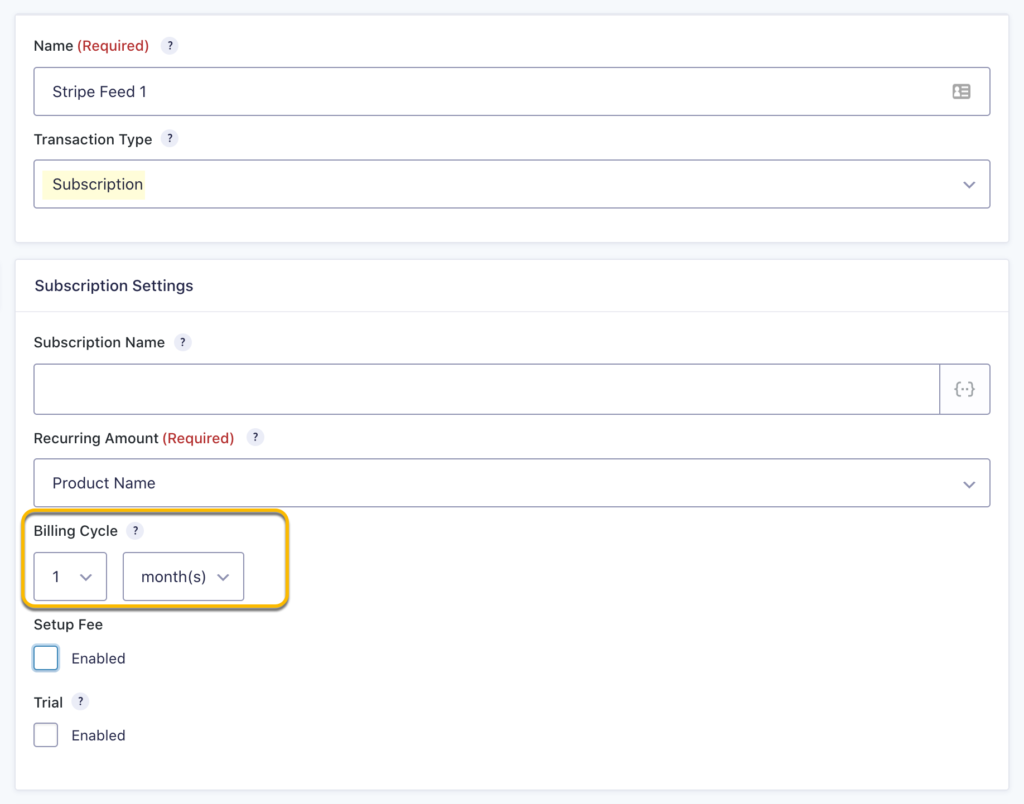
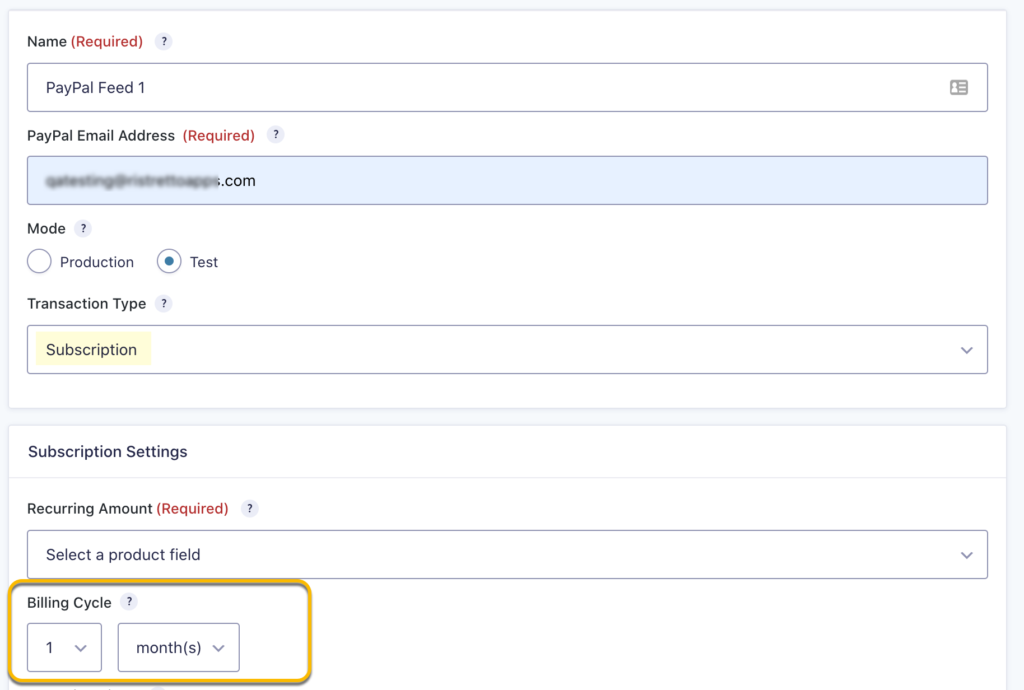
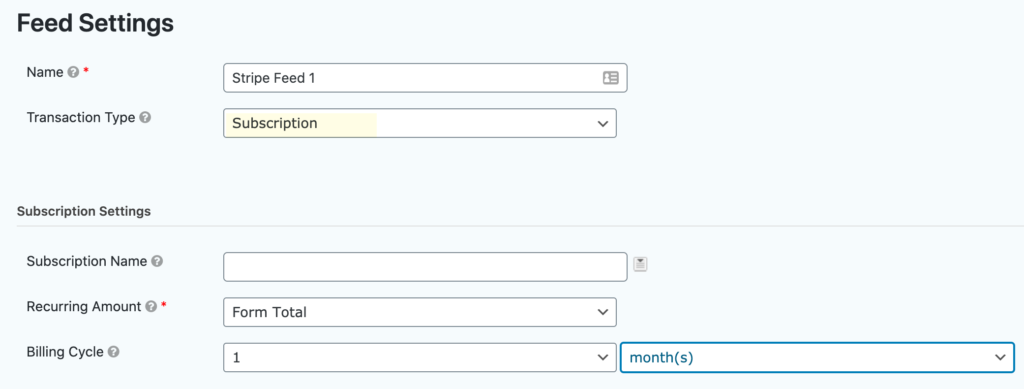
- Under the Stripe Feed settings that you will be setting up later, make sure that you set the transaction type to Subscription for recurring payments. The payment amount should also be the amount on your Form Total. The billing cycle on the other hand, should always match the interval of the PMP membership you’ve added to your form.
The same settings should be applied for the PayPal feed.
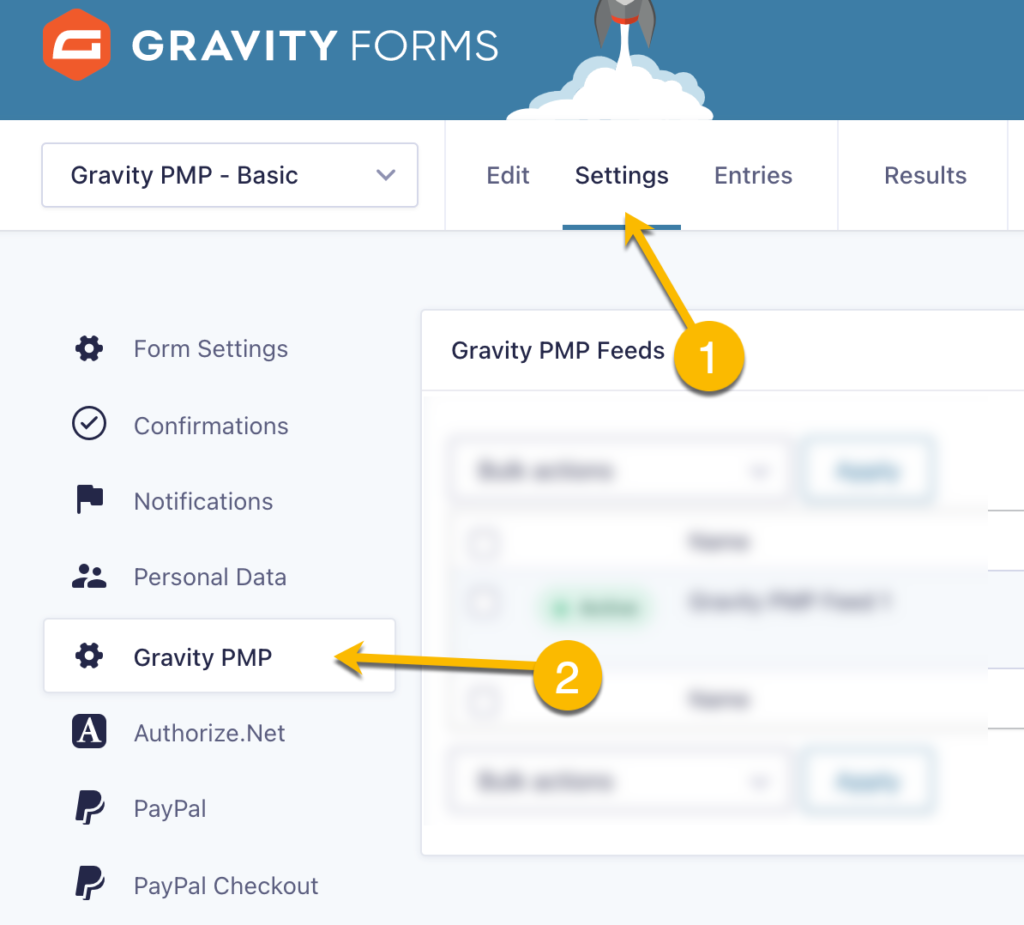
2. Set up your Gravity PMP feed. To do this, go to your Form Settings and select Gravity PMP.
- Add a new feed. Under the Value column, select the product field where you have added your PMP levels in. You do not have to add separate Membership Field for each PMP level you have since it’s already taken care of in the Product field you have previously created. You have to use one row per form field if you want to add a user to multiple levels at once.
In this example, I choose the field “Choose membership” because this was the field label of the Product field I have created. Hit on Update Settings to save the feed.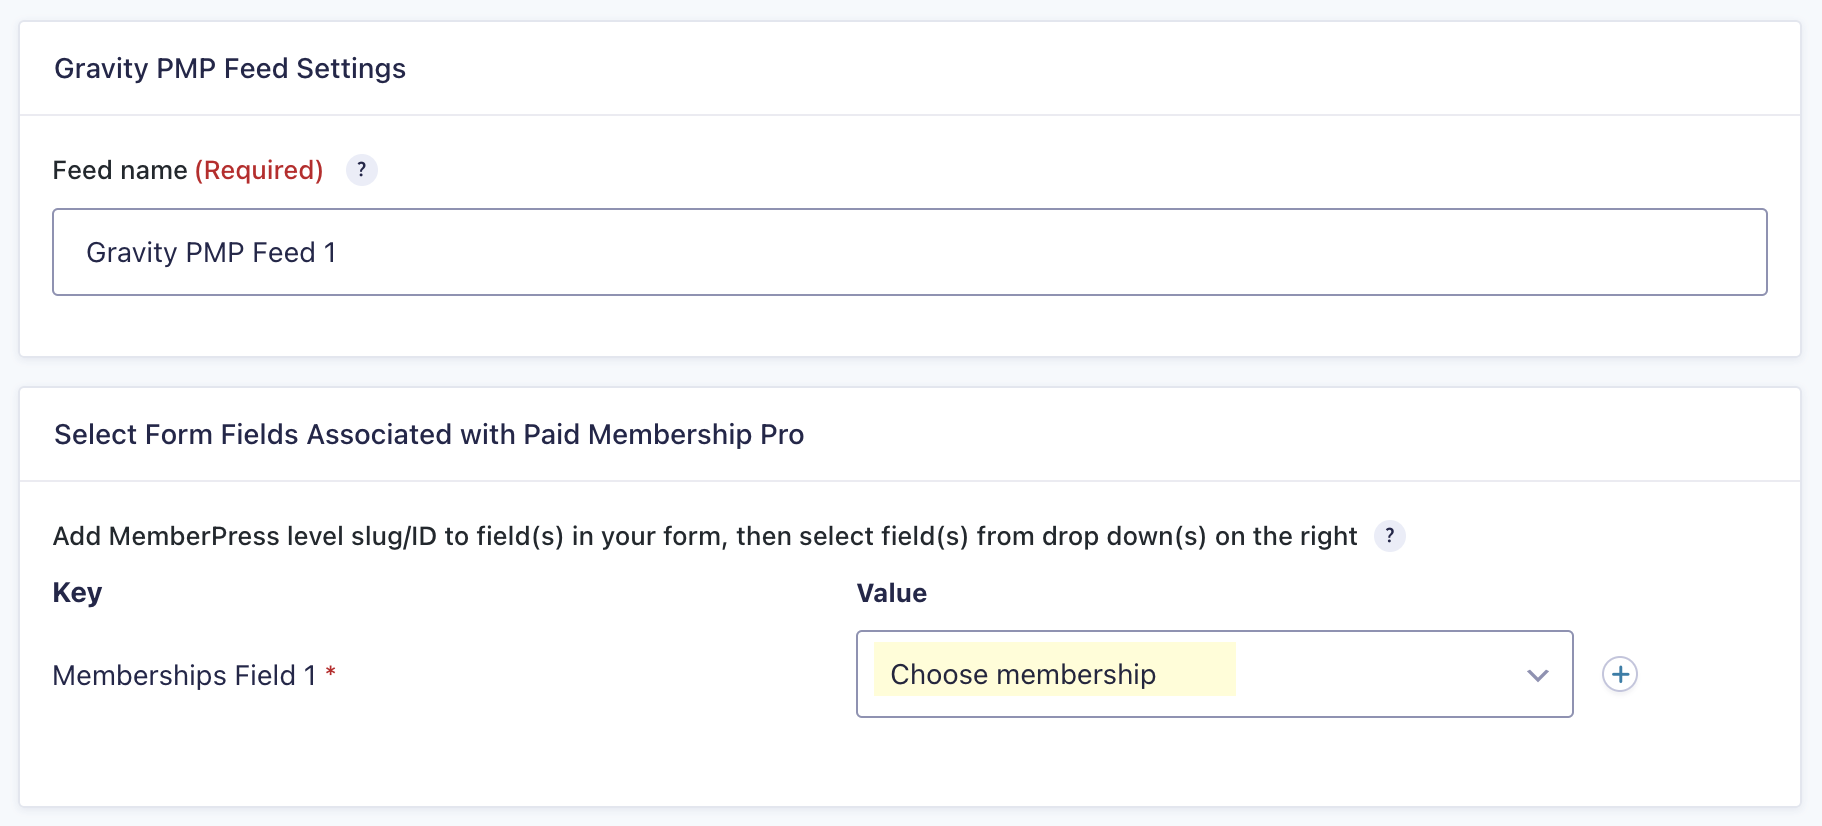
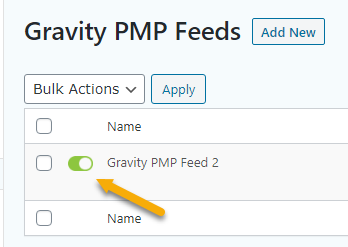
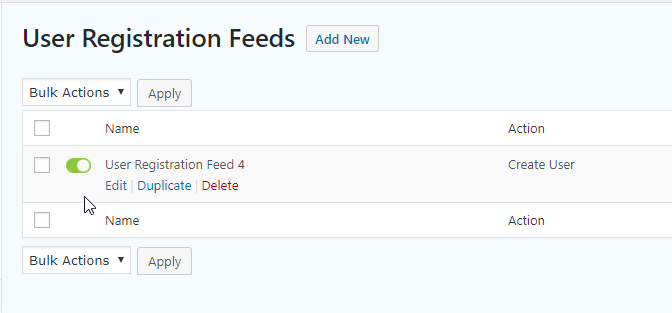
You can verify that the new feed you have set is Active if the toggle icon is green. You can simply disable it by clicking on the same icon.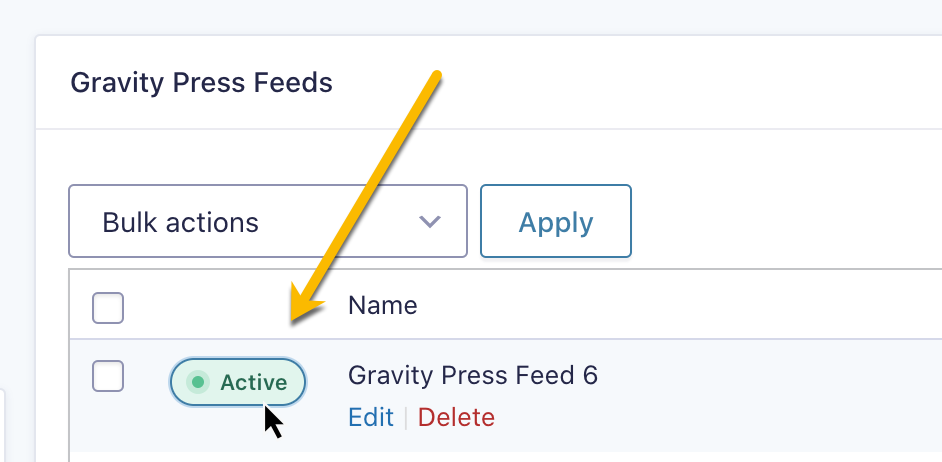
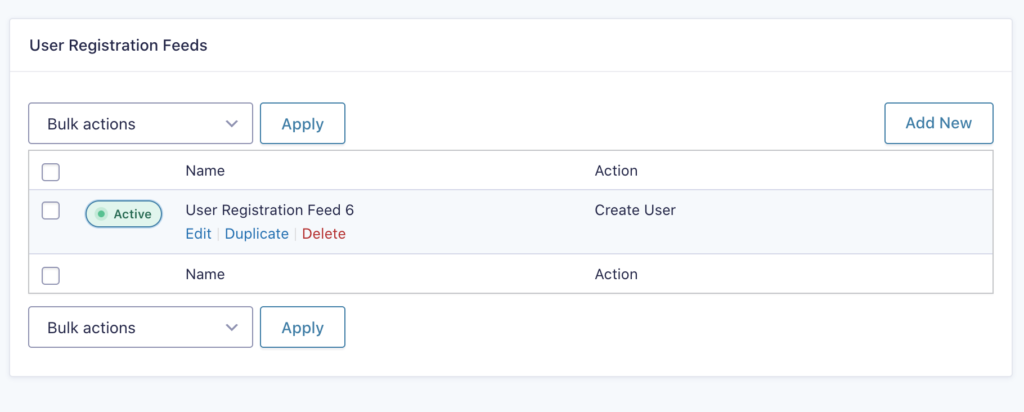
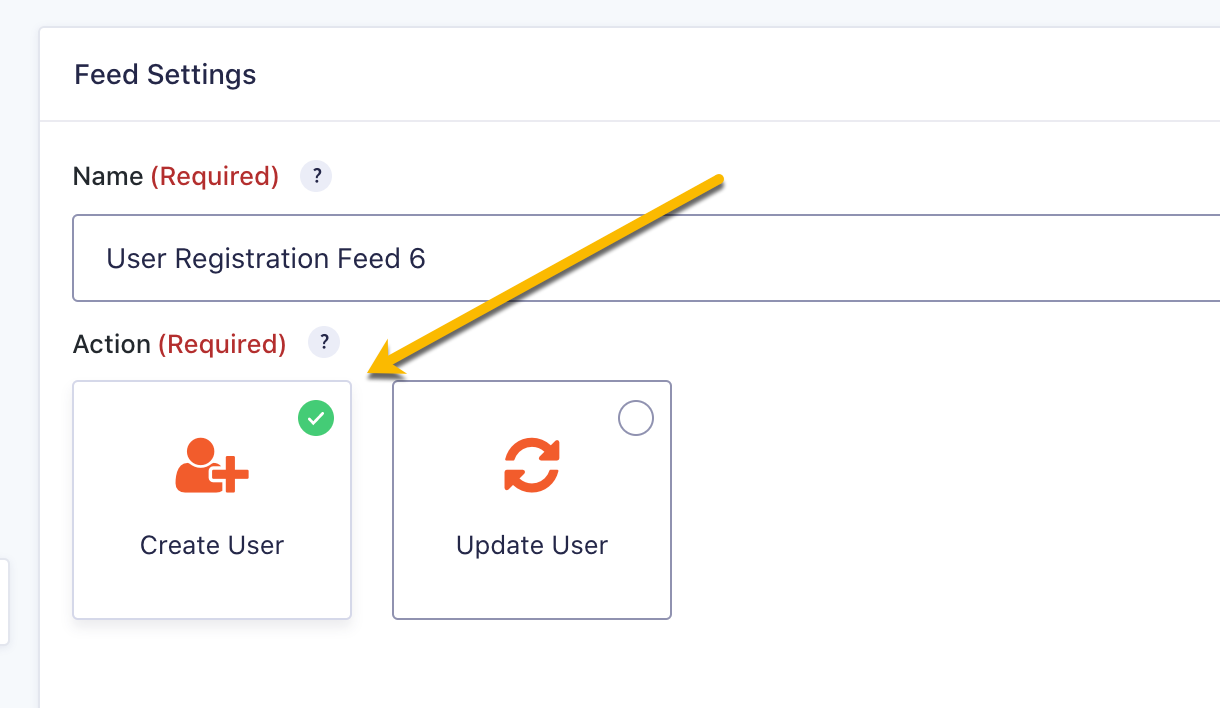
3. Then we can proceed with creating a new “User Registration” feed to register your new users. For more information on how to set up this add-on, please refer to this page or contact Gravity Forms tech support team as this is their support.
If you are using the form for logged-in users there is no need to create a User Registration feed unless if you need your logged-in users to update their profile through this Gravity Form, in which you will have to select the option for Update User. If you are using both for the registration of new user and updating of membership level for logged-in users, please see this article on how to disable the user registration feed for logged-in users.
- Choose Create User if you want to register the form submitter to your site.
4. Lastly, set up your payment settings by configuring or creating new feed for PayPal or Stripe.
Gravity PMP Setup for Recurring Payments using Gravity Forms 2.4x
Creating the Form
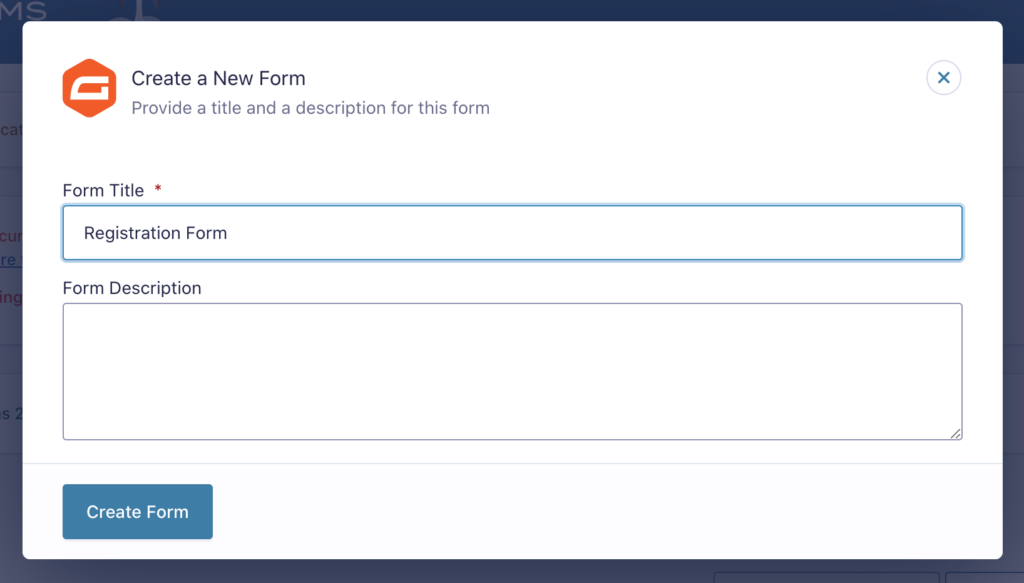
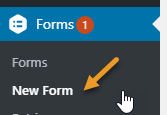
- To begin, simply create a form (checkout or signup form) with Gravity Forms. To do this, click the Form link in the left column of the WordPress admin and then click on New Form.
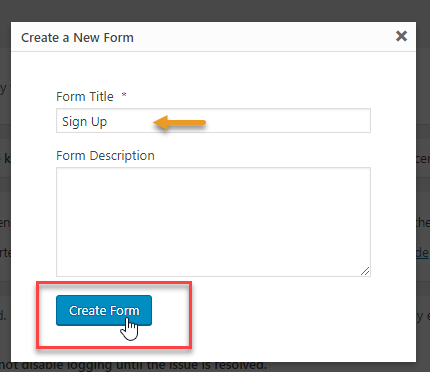
- Fill out the Form title and Form description (optional) and proceed with creating a new form. In this sample, we will be doing a Signup Form.
- Proceed with adding the necessary fields to your form. A simple check out form would usually include the ff fields:
- Name
- Product
- Total
- Credit Card (optional, depending on your payment method)
To use Gravity PMP, we can either use two fields: Drop Down or Radio Button. These are the two recommended options that we would suggest.
- In this example however, we will be using the Product field and we’ll transform it to a Radio Button. Turning your Product field into either drop down or a radio button is what you should add to your form if you’re accepting payments. This is because with the Product field, you are able to set the prices which is needed when setting up your payment feed later on.
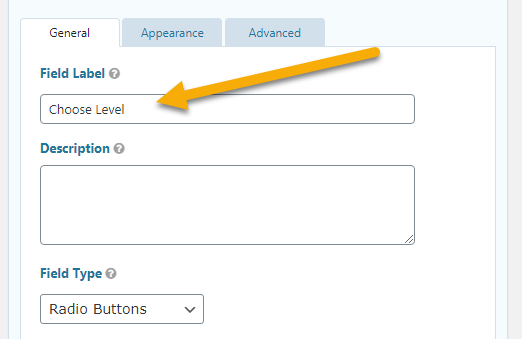
- Rename the Product field label.
- Check the box for show values so that it would show both the value and the price of the choices.
- Then, proceed with clicking on the Bulk Add/Predefined Choices – this would allow you to have access to the Paid Memberships Pro levels you have already set up as well as their specific ID.
- After clicking on the Bulk Add button, a new box will pop up, scroll down to Gravity PMP and select the (recurring subscription) PMP memberships you’d want to add to your form. Drag your cursor all over those Paid Memberships Pro levels and click on Insert Choices.
- It will automatically reflect the Paid Memberships Pro level IDs and their respective prices.
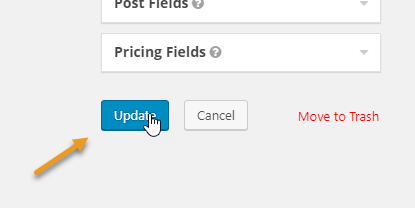
- And then proceed with clicking on Update to successfully save and set up your form.
Setting up the Feeds
- To make the form you have created work, you also need to set up the feeds. To do this, go to your Form Settings and select Gravity PMP.
- Add a new Gravity PMP feed. Another important note, you do not have to add separate Paid Memberships Pro Field for each level you have since it’s already taken care of in the Product field you have previously created. In this example, I choose the field “Choose Level” because this was the field label of the Product field I have previously created.
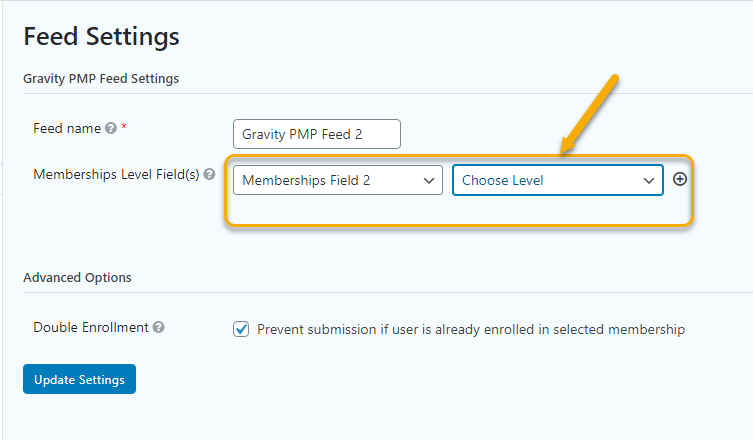
- Click on Update Settings to save it.
- You can verify that the new feed you have set is Active if the toggle icon is green. You can simply disable it by clicking on the same icon.
- Then we can proceed with creating a new “User Registration” feed to register your new users. For more information on how to set up this add-on, please refer to this page.
- Lastly, you can set up your payment settings by configuring or creating new feed for Paypal and/or Stripe. For recurring subscriptions, you need to make sure that the transaction type on your payment feed settings is set to Subscription. Also make sure that the billing cycle matches the billing cycle of your PMP membership.
Can we set coupon codes with this addon?
Not at this exact moment, but we’re actively building this feature and expect to have it out within about a month. Feel free to check in with us using our contact form if you’re interested in specifics.
Thanks!