Introduction
Gravity Tables is a pricing tables plugin designed specifically for Gravity Forms. It enhances the appearance of checkout forms and improves user experience, leading to better conversions. This tutorial will walk you through the steps to set up and use Gravity Tables.
Step 1: Install the Gravity Tables Plugin
- Download and install the Gravity Tables plugin from your Ristretto Apps account after purchasing.
- Activate the plugin in your WordPress dashboard.
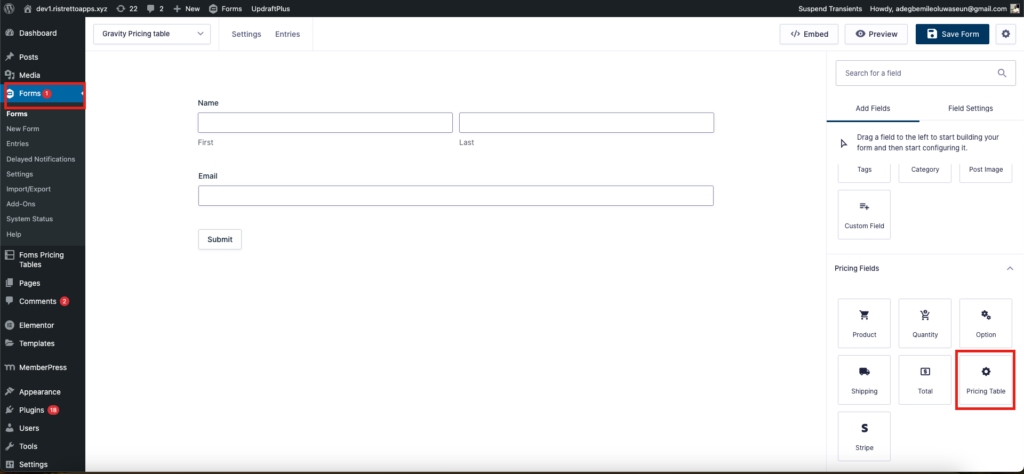
Step 2: Adding a Pricing Table to Gravity Forms
- Navigate to Gravity Forms in your WordPress dashboard.
- Open the form where you want to add a pricing table.
- Go to the Pricing Fields section.
- Select Pricing Table Field and add it to your form.
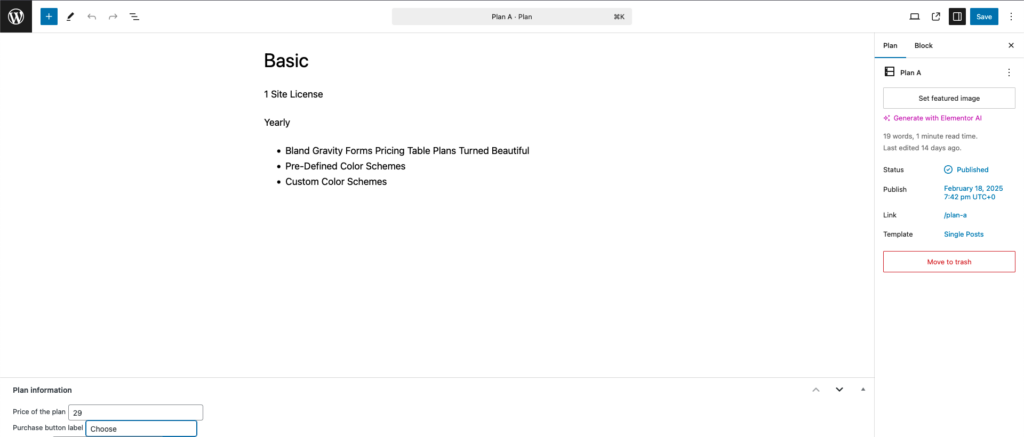
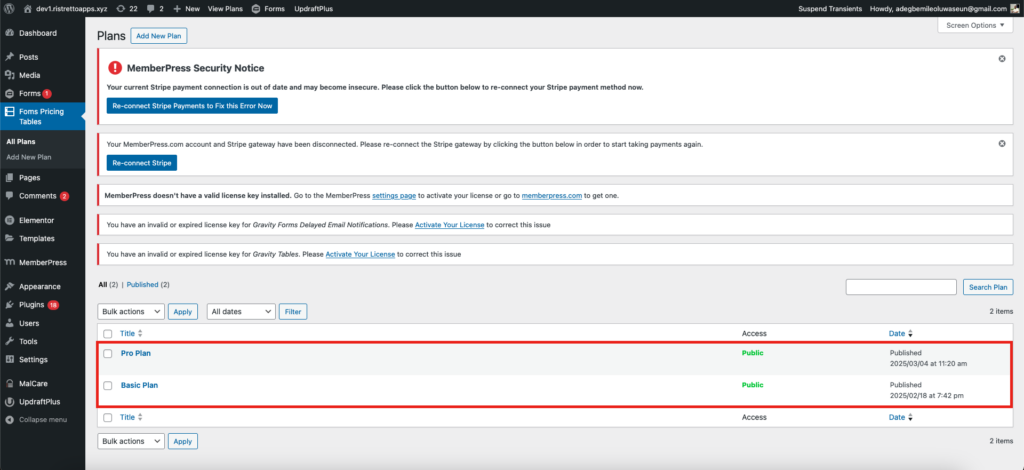
Step 3: Creating Pricing Plans
- Go to the Pricing Plans section of Gravity Tables.
- Click Add New Plan.
- Enter the plan details:
- Name: Give your plan a descriptive title.
- Description: Provide a brief overview of what the plan includes.
- Price: Set the price for the plan.
- Button Text: Customize the checkout button label.
- Click Save Plan.
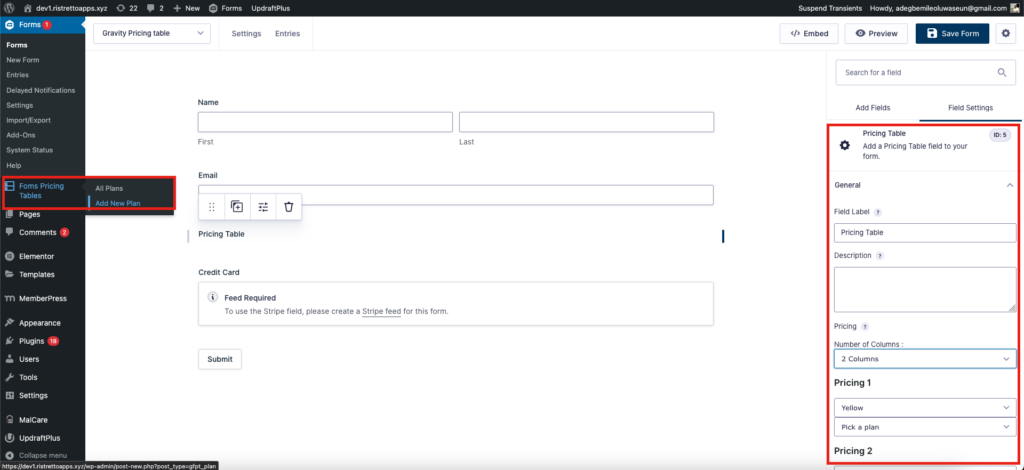
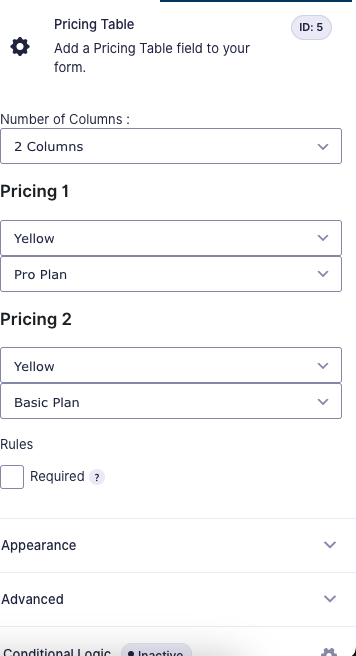
Step 4: Embedding the Pricing Table in a Form
- Click Update Form.Open the Gravity Form where you want to place the pricing table.
- Locate the Pricing Table Field.
- Choose a plan from the ones you created for your pricing table you want to display.
- Select a color scheme to match your brand.
- Define the number of columns (up to five) for different plans.
- You can adjust the max-width settings to control column sizes.
- You can set one plan as the highlighted plan to make it stand out.
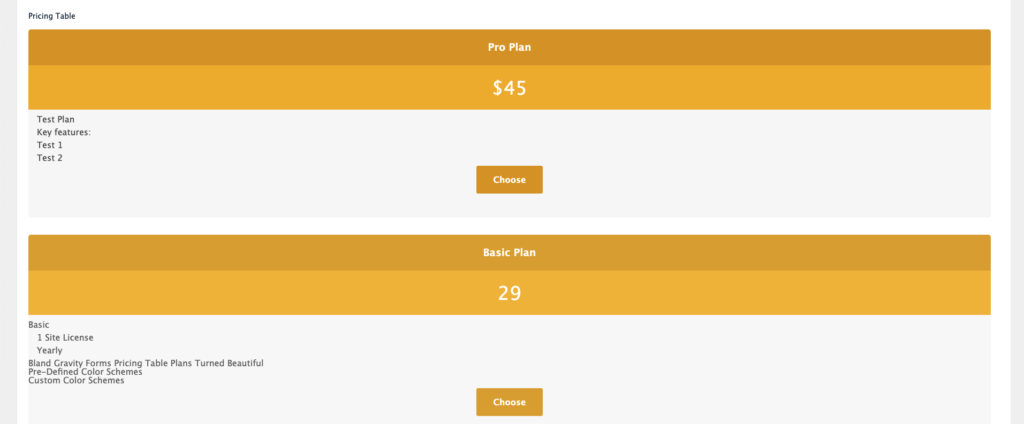
Step 5: Previewing and Testing the Pricing Table
- Open your form on the frontend.
- Navigate to the page where the pricing table is displayed.
- Check that:
- The correct plans are listed.
- Users can select a plan.
- The price updates dynamically based on the selection.
- Adjust the pricing table settings if necessary.
Step 6: Using Pricing Tables Across Multiple Forms
- Create another form in Gravity Forms.
- Add a Pricing Table Field.
- Choose different pricing plans to mix and match.
- Customize the layout and colors for variation.
- Update the form and test the new setup.
Conclusion
Gravity Tables simplifies pricing plan management in Gravity Forms. It enhances the look and feel of checkout pages, improves user experience, and boosts conversions. If you’re selling SaaS subscriptions, eCourses, memberships, or services, this plugin is a must-have.
To get started, visit Ristretto Apps and download Gravity Forms Pricing Tables today!