Introduction
Display Form Entries allows you to display Gravity Forms submissions on the front end of your WordPress website.
With this plugin, you can turn form submissions into directories, listings, dashboards, or public data views without writing custom code.
This guide explains how to:
• Install the plugin
• Activate the Pro license
• Understand the difference between Basic and Pro features
Requirements
Before installing the plugin, make sure you have:
- WordPress installed and running
- Gravity Forms installed and activated
- A valid Display Form Entries Pro license key (for Pro features)
Installing the Plugin
To start using Display Form Entries, you must first install and activate the plugin on your WordPress site.
There are two common ways to install the plugin:
- Using FTP
- Using the WordPress dashboard
Via WordPress
- The process is similar to how you would install a normal plugin. First, you have to go to the WordPress dashboard, go to plugins and click “Add New”
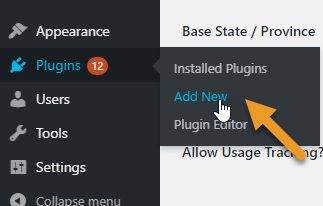
- You will see the option for “Upload plugin”

- Use the file chooser, navigate your computer files and select the downloaded zip file of the plugin you want to install.
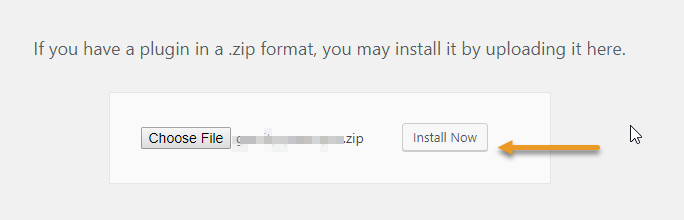
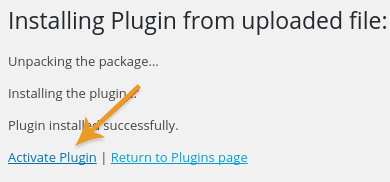
- After it’s fully uploaded, just click the “Activate” link
Via FTP
FTP stands for File Transfer Protocol. In order to use FTP you’ll need a client program for your computer.
Click here to read Lifehacker’s article on the best FTP programs for Mac and Windows.
Unzip the file before you transfer the plugin. With OSX, this can be achieved by simply double clicking the zip file. With Windows, you will have to right click on the zip file and then select the option Extract All. These two instructions will automatically create a new folder named the same as the zip file.
After doing this, you will have to connect to your server using your FTP program. After you have connected, you need to find the Document Root for your site. This is basically the folder where all of your WordPress files are. It is usually called public_html or named the same as your site’s domain name but it could be anything. If you’re not certain, please feel free to ask your host.
After locating your Document Root, you will have to use your FTP program to go into wp-content/plugins/. Proceed with uploading the plugin folder that was created by unzipping the plugin file.
Important Note: Ensure that you upload the plugin folder, not the zip file since the zip file won’t function on your site.
After Installing
Once you’ve installed and activated your extension there are several things you should do.
Activate Your License
Simply go to your WordPress dashboard, click on Forms → Settings → General Settings and enter the key there.
Configure Settings
Generally, our plugin’s settings can be found on the left sidebar of your WordPress Dashboard.
Activating the Pro License
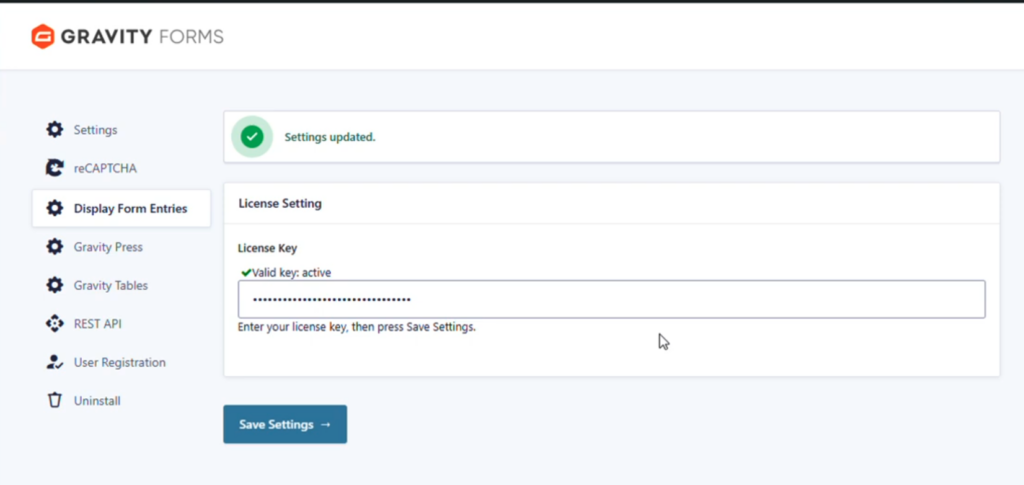
- Go to Forms → Settings
- Click the Display Form Entries Pro tab
- Paste your license key
- Click Activate
You should see a confirmation message once activated.

Where to Configure Plugin Settings
Most Display Form Entries settings are available directly within the block editor when using the Display Form Entries block.
You can configure:
- Display templates
- Field selection
- Styling controls
- Filtering options
- Frontend editing features
Basic vs Pro Feature Overview
Display Form Entries is available in two versions.
Basic Version
The Basic version includes core functionality such as:
- Display entries using Table, Grid, List, or Linked List views
- Backend entry editing
- Basic entry display options
Pro Version
Display Form Entries Pro includes all Basic features plus advanced capabilities such as:
- Advanced filtering controls
- Styling customization
- Displaying specific form fields
- Featured / starred entries
- Single entry detail pages
- Frontend entry editing
Additional features may be added in future releases.