Introduction
Display Form Entries Pro allows you to create dedicated pages that display the full details of a single form entry.
This is especially useful when building:
- Member directories
- Product listings
- Vendor directories
- Event registrations
Users can first browse entries in a list view, then click an entry to open a detailed summary page showing all information for that specific submission.
This is typically done using two components:
- Linked List display – shows a list of entries with clickable links
- Single Entry block – displays the full details for one entry
Part 1 — Creating the Entry Listing (Linked List View)
First you need a page that displays multiple entries with links to the detailed view.

Step 1 — Add the Display Form Entries Block
- Edit the page where you want to display your entries.
- Click Add Block (+).
- Search for:
Display Form Entries
- Add the block to the page.
Step 2 — Select the Form
In the block settings:
- Choose the Gravity Form you want to display entries from.
- The entries from that form will now appear in the block preview.
Step 3 — Choose the Linked List Display
Under Display Options, select:
Linked List
This layout allows each entry to contain a clickable link that opens a detailed summary page.
Step 4 — Choose Which Field Should Contain the Link
Scroll down in the block settings.
You will see options to choose which field becomes the clickable link.
Examples include:
- Name
- Product name
- Entry ID
Select the field you want users to click.
For example:
• Selecting Name will make the user’s name clickable.
Step 5 — Save the Page
Click Save or Update.
On the front end:
- A list of entries will appear.
- The selected field will now act as a link.
When users click the link, they will be taken to the detailed entry page.

Part 2 — Creating the Single Entry Detail Page
Next, you need to create a page that displays the full details of an entry.
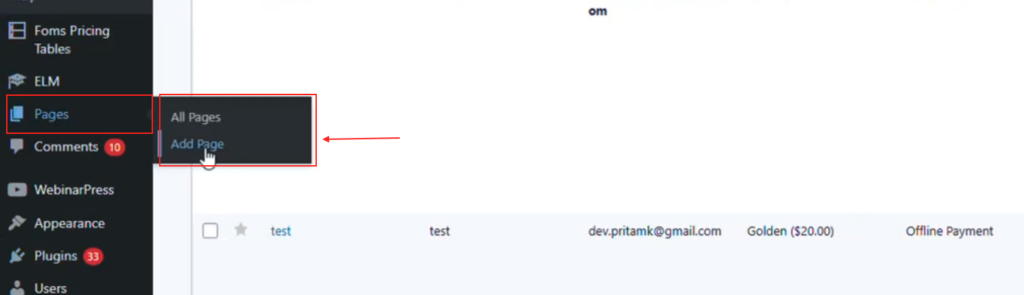
Step 1 — Create a New Page
- Go to Pages → Add New.
- Give the page a title, such as:
Entry Details
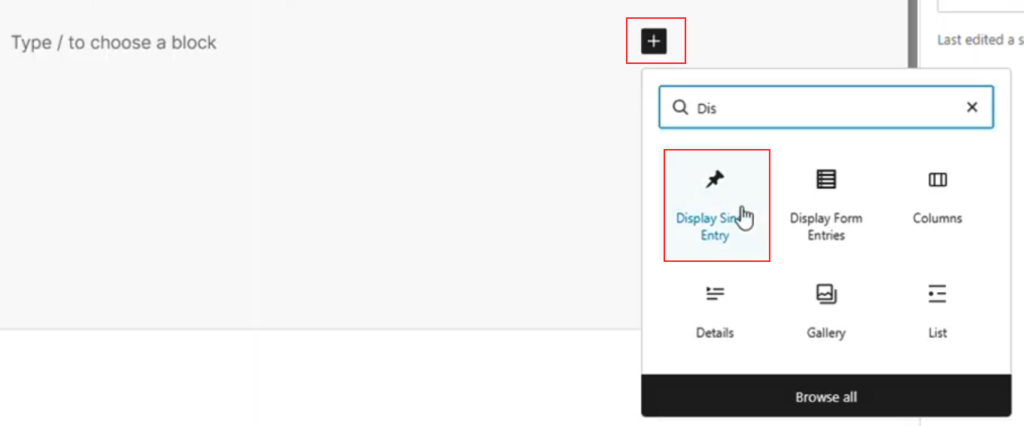
Step 2 — Add the Single Entry Block
- Click Add Block (+).
- Search for:
Single Entry
- Add the block to the page.
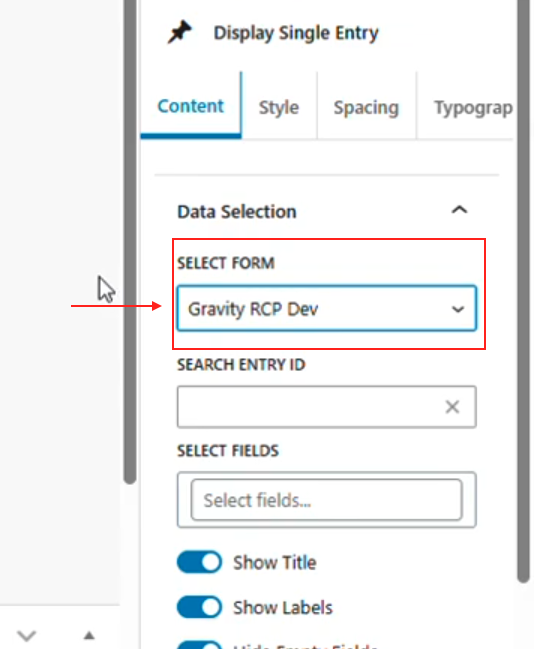
Step 3 — Select the Form
Inside the block settings:
- Choose the Form connected to the entries.
- The block will now allow you to select an entry.
Step 4 — Select an Entry
You can display an entry by:
• Searching for the entry
• Entering the Entry ID
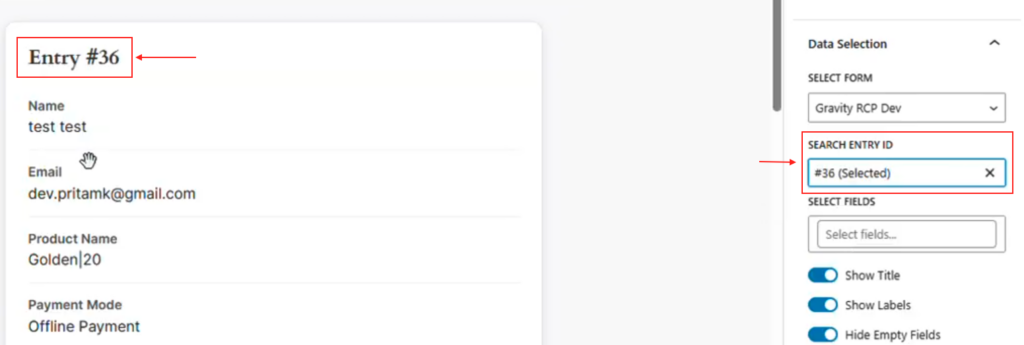
Once selected, the full entry details will appear.
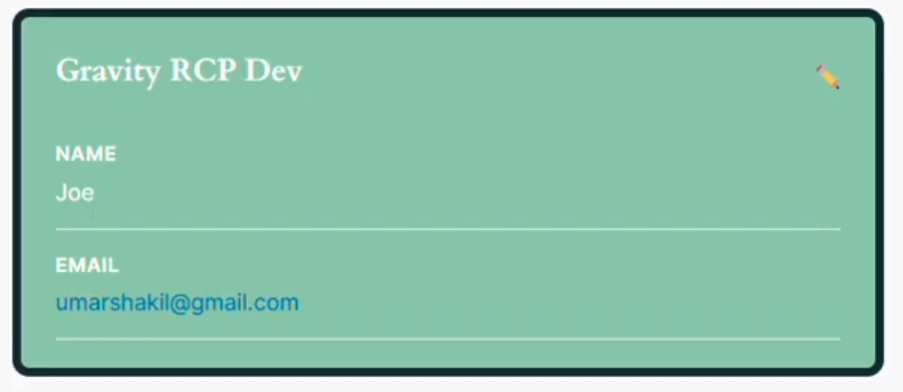
Customizing the Entry Display
The Single Entry block provides several styling and layout options.

These are available in the block sidebar under:
- Style
- Spacing
- Typography
You can customize:
Background
Change the background color of the entry display.
Borders
Add borders and adjust border width.
Spacing
Control padding and spacing around the entry fields.
Typography
Adjust:
- Label color
- Field value color
- Font size
- Title styling
These options allow the entry display to match your website design.
Displaying Specific Fields
You can choose whether to show:
• All fields from the entry
or
• Only selected fields
For example you may choose to display:
- First name
- Last name
- Product name
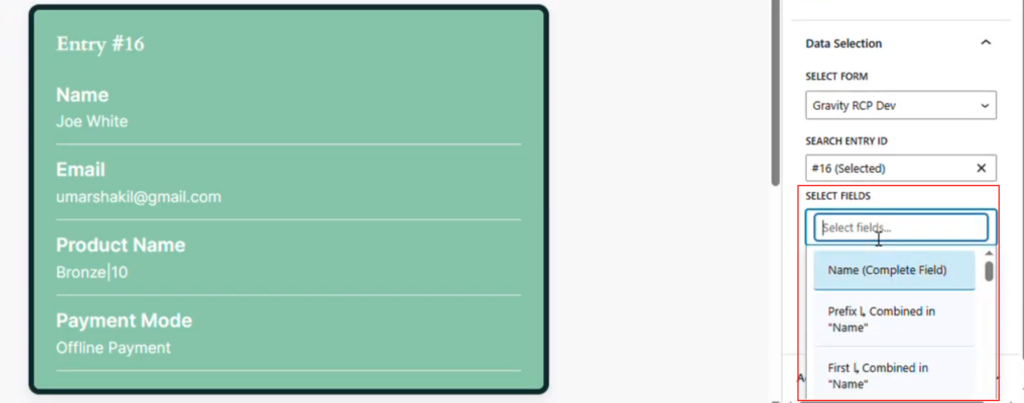
instead of showing every form field.
Returning to the Entry List
When viewing a detailed entry page, users can return to the listing by clicking:
Back to List
This returns them to the main directory or listing page.
Example Use Case
Vendor Directory
A site lists vendors using the Linked List view.
Each row shows:
- Vendor name
- Product category
When a user clicks the vendor name, they are taken to a Single Entry page showing:
- Vendor details
- Contact information
- Product description
- Additional fields
This creates a clean directory → detail page experience.
Best Practices
• Use Linked List view for directories and listings.
• Use the Single Entry block to display full entry details.
• Limit the fields shown in listings to avoid clutter.
• Use styling controls to match the layout with your site design.
Troubleshooting
Entry details are not displaying
Check that:
- The correct form is selected in the Single Entry block.
- The Entry ID exists.
Links are not appearing in the list
Make sure:
- Linked List view is selected.
- A field has been chosen as the link field.