Introduction
Display Form Entries Pro allows you to control which form submissions appear on the frontend using advanced filtering options.

This feature allows administrators to:
- Display a specific entry by its Entry ID
- Limit how many entries appear on the page
- Reset filters to return to the default listing
Advanced filtering is useful when you want to highlight or isolate certain submissions without modifying the underlying Gravity Form.
Requirements
Before using advanced filtering, make sure:
- Gravity Forms is installed and active
- Display Form Entries Pro is activated
- Your page already contains the Display Form Entries block
Displaying a Specific Entry
You can filter the display to show only one entry by entering its Entry ID.
Step 1 — Edit the Page
- Go to the page where the entries are displayed.
- Open the page in the WordPress block editor.
- Select the Display Form Entries block.
Step 2 — Enter the Entry ID
In the block settings:
- Locate the Entry ID filter field.
- Enter the ID of the entry you want to display.
Example:
36
Step 3 — Save the Page
Click Save or Update.
When the page is refreshed on the frontend, only the selected entry will appear.
Changing the Displayed Entry
You can update the displayed entry at any time.
- Return to the page editor.
- Replace the Entry ID with a different one.
Example:
41
42
36
After saving the page, the new entry will appear on the frontend.
Resetting the Filter
If you remove the Entry ID value and save the page, the block will return to the default behavior, displaying all entries again.
This allows you to easily switch between:
- Showing one specific entry
- Showing all entries
Limiting the Number of Entries Displayed
You can also control how many entries appear on the page.
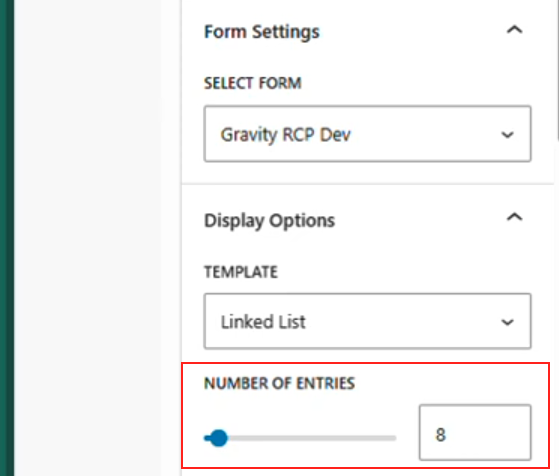
For example, you can display only:
- 5 entries
- 6 entries
- 10 entries
To do this:
- Select the Display Form Entries block.
- Locate the Entries per page / entry limit setting.
- Enter the number of entries you want displayed.
- Save the page.
The frontend will now display only the specified number of entries.
Example Use Case
Highlighting a Featured Submission
A website collects form submissions for product listings.
Using advanced filtering, the site owner can:
- Display only one featured entry on the homepage
- Show multiple entries on a listing page
- Change which entry is featured by updating the Entry ID
This allows flexible content display without editing the original form.
Best Practices
• Use Entry ID filtering when you want to highlight a specific submission.
• Use entry limits to keep pages clean and easy to browse.
• Reset the filter if you want to return to the full entry listing.
Troubleshooting
Entry is not appearing
Check that:
- The Entry ID exists in Gravity Forms
- The correct form is selected in the block
Page shows no entries
Make sure the Entry ID filter is not set to an invalid or non-existent entry.